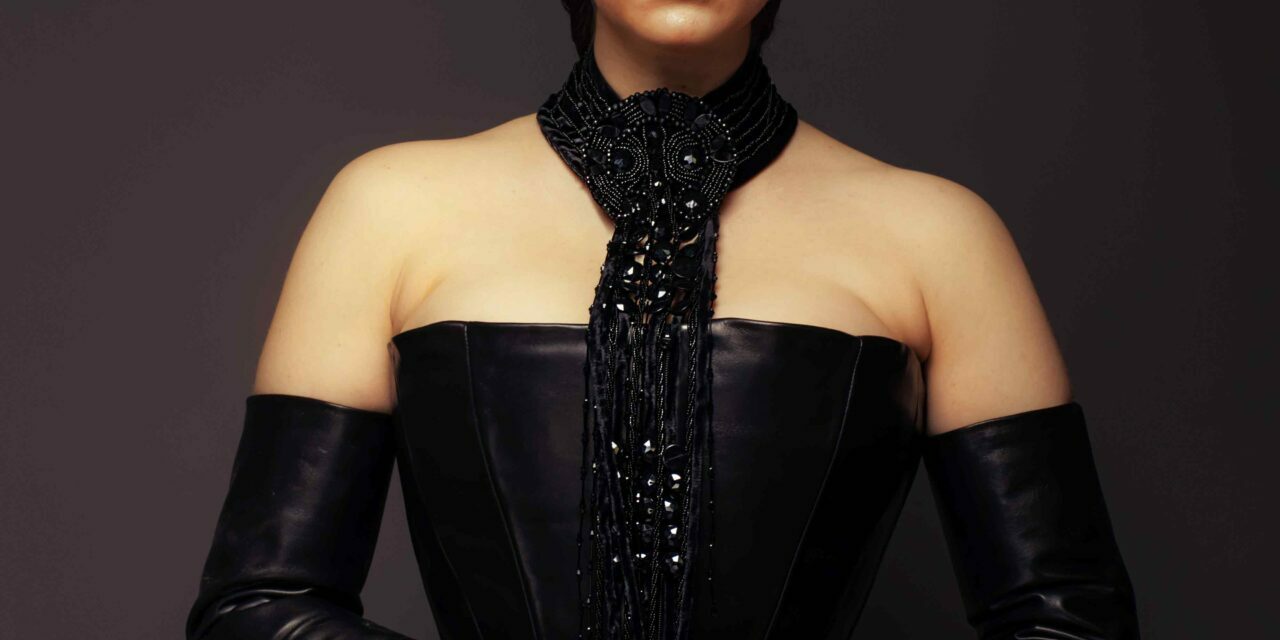
With this post I am going to share with you the analysis of Pamdmé’s Corset Gown I did before remaking mine. It was among the first five cosplays I have made, as I thought it was an easy one, bakc in 2011. Boy, I was wrong!
I usually share these things in my tutorials, so why am I sharing this part openly?
Well, I want you to see what you will find in my tutorials, and understand how much easier they can make the process of replicating a dress! Let’s call this a tester, or a sample.
HERE you can find the ones I already made, and some more are in the works.
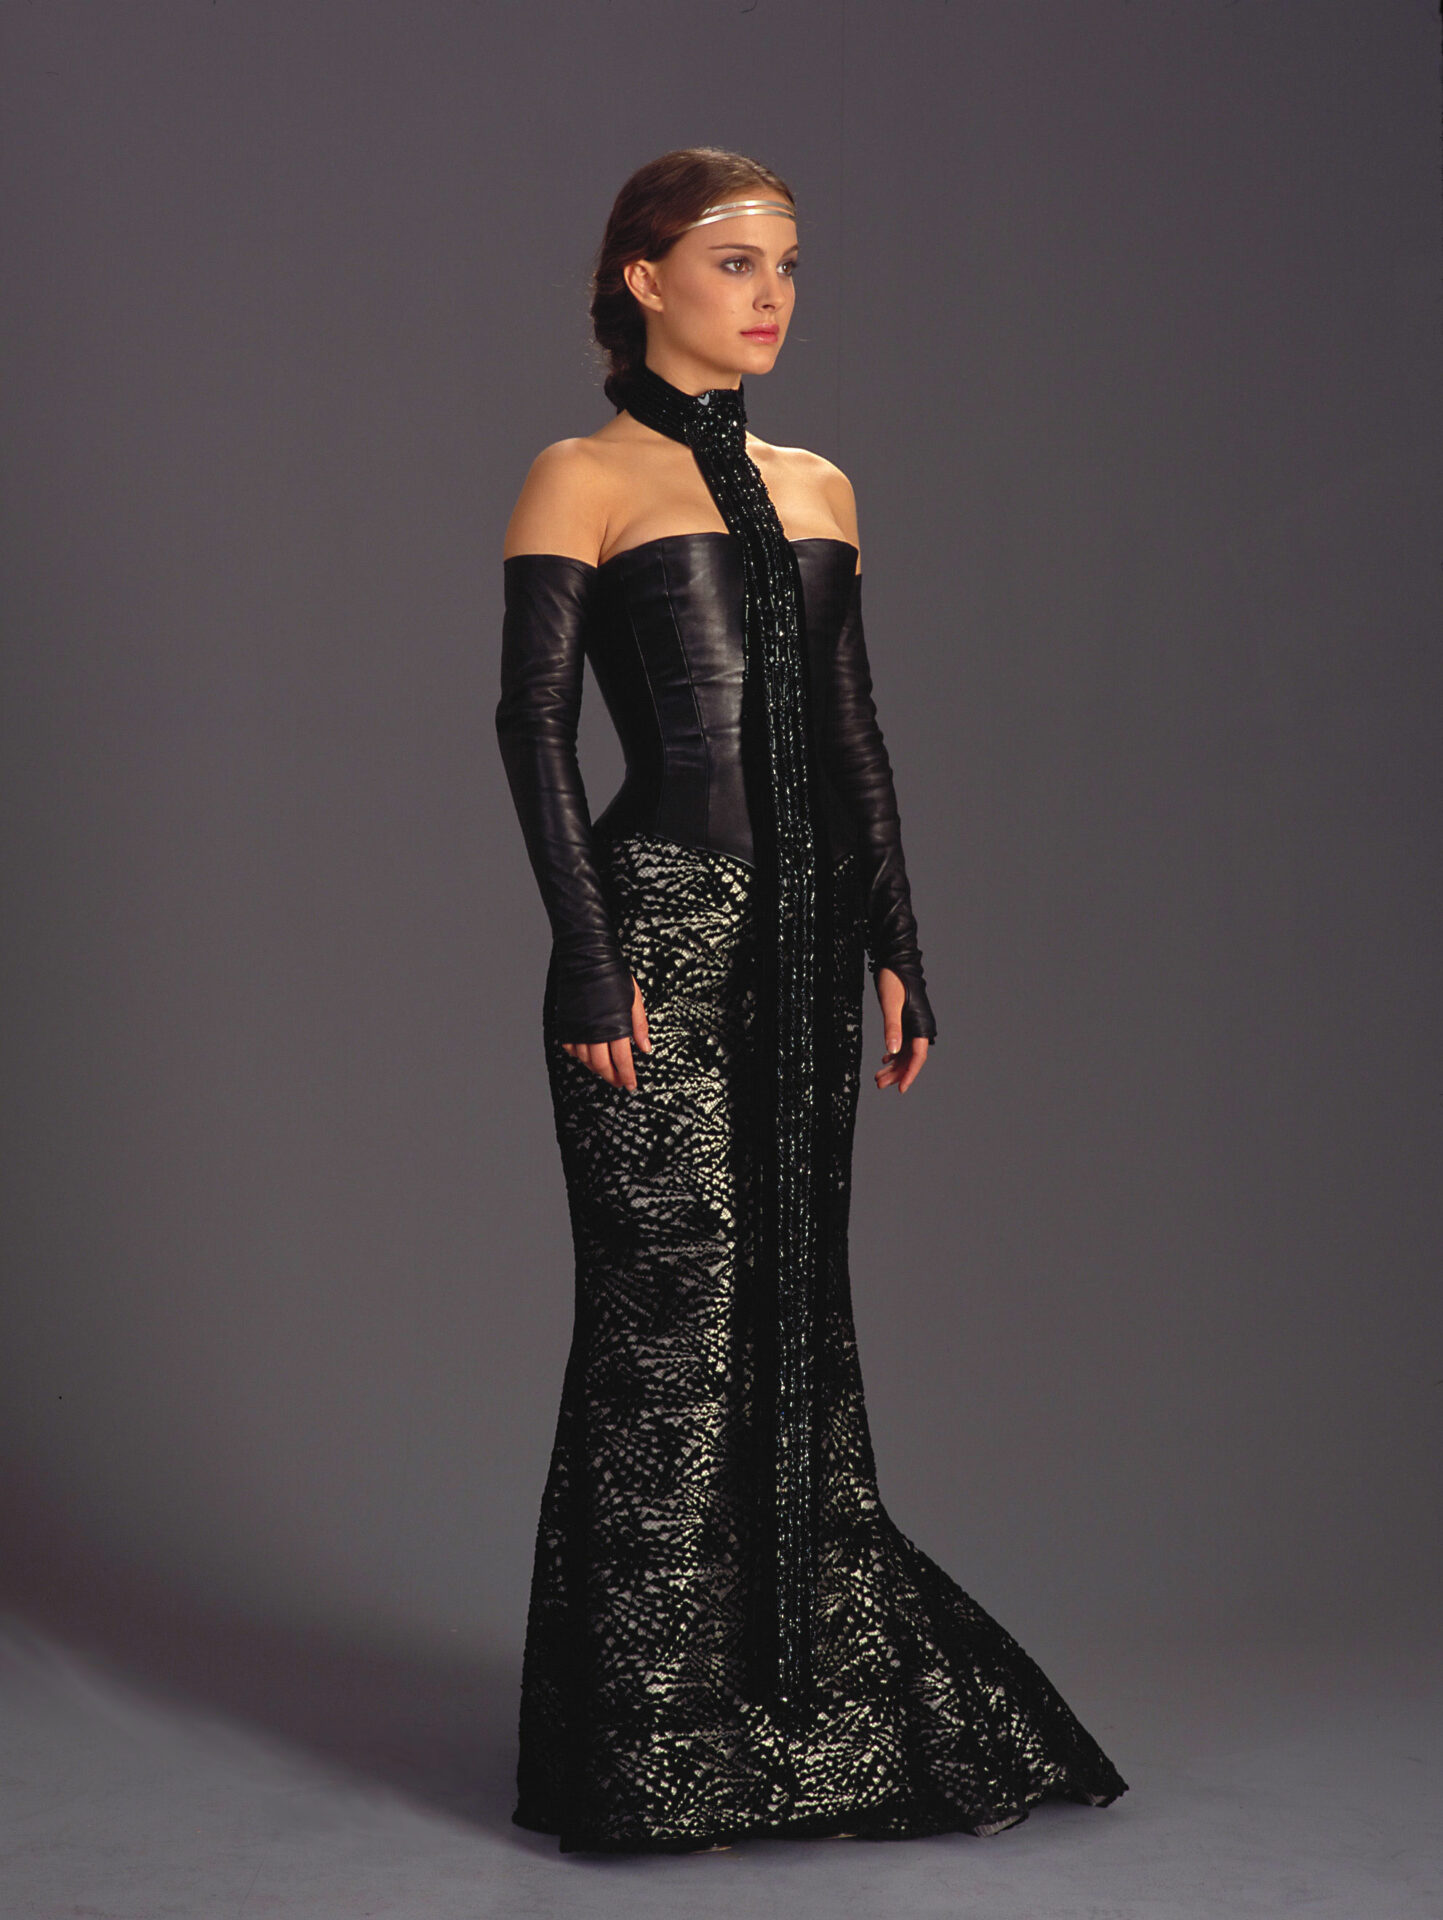
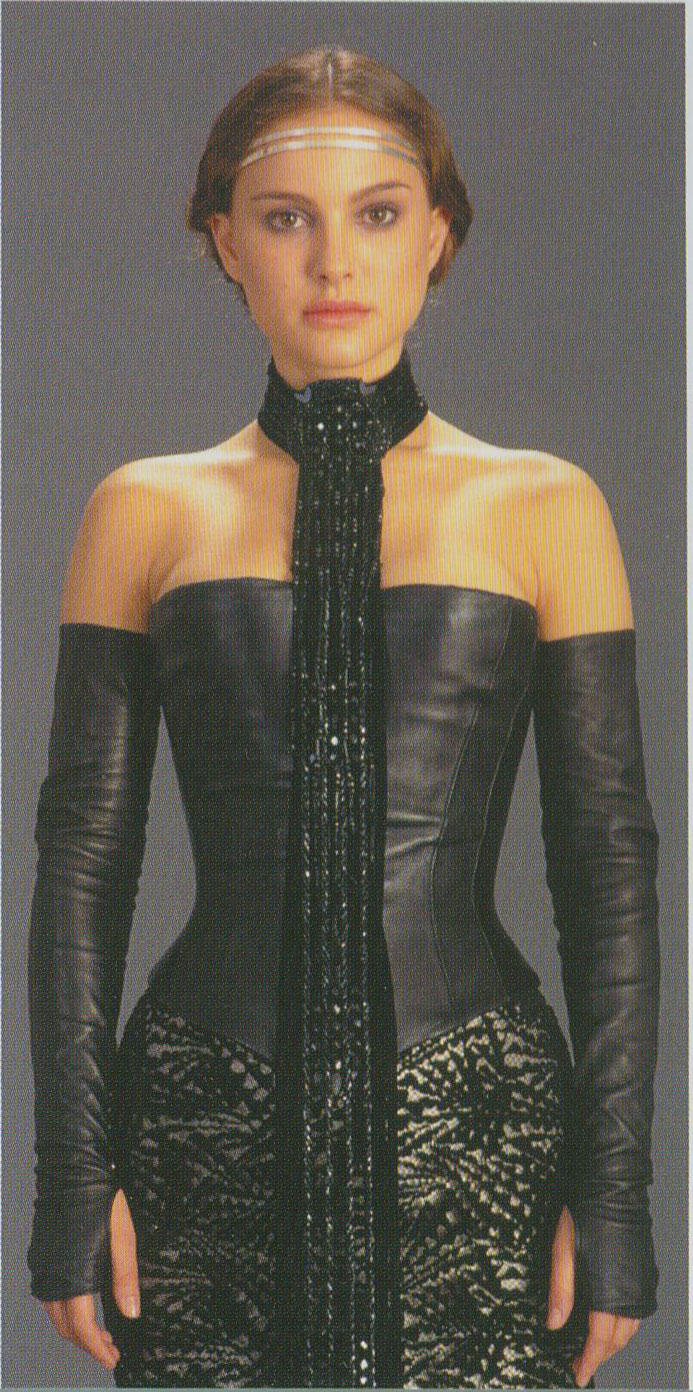
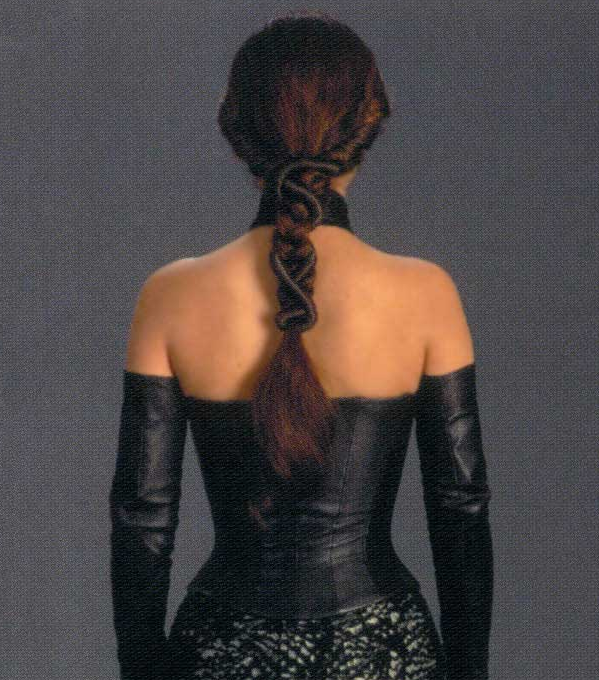
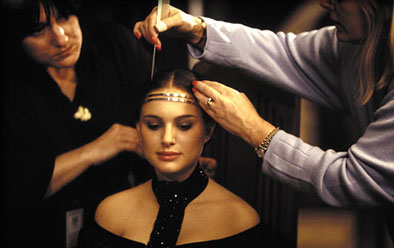
Here I have attached a few reference images of the original. You can find more in the Padawan’s Guide, which, after my copy of Dressing a Galaxy, is my primary source for reference images.
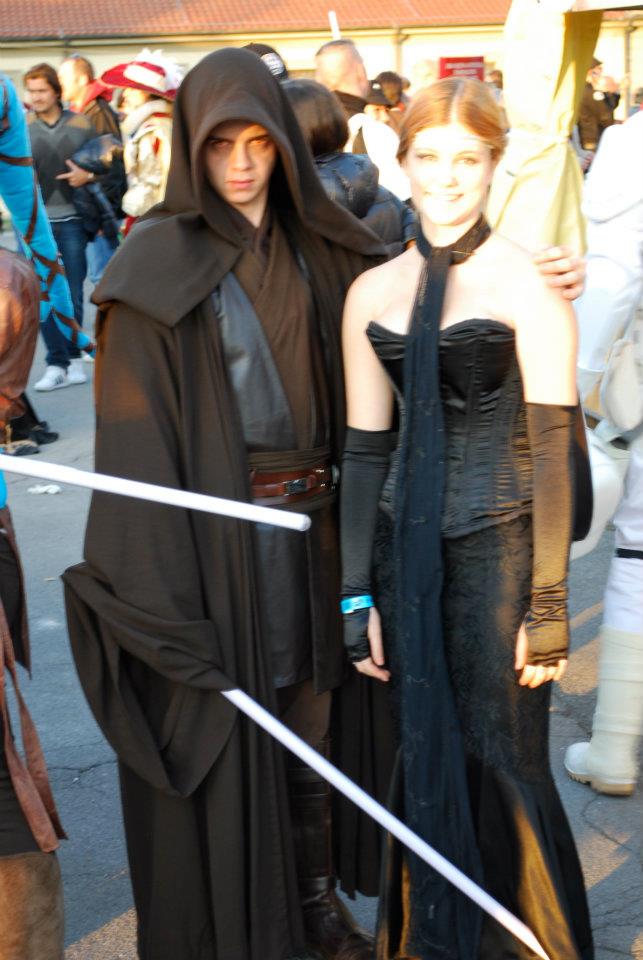
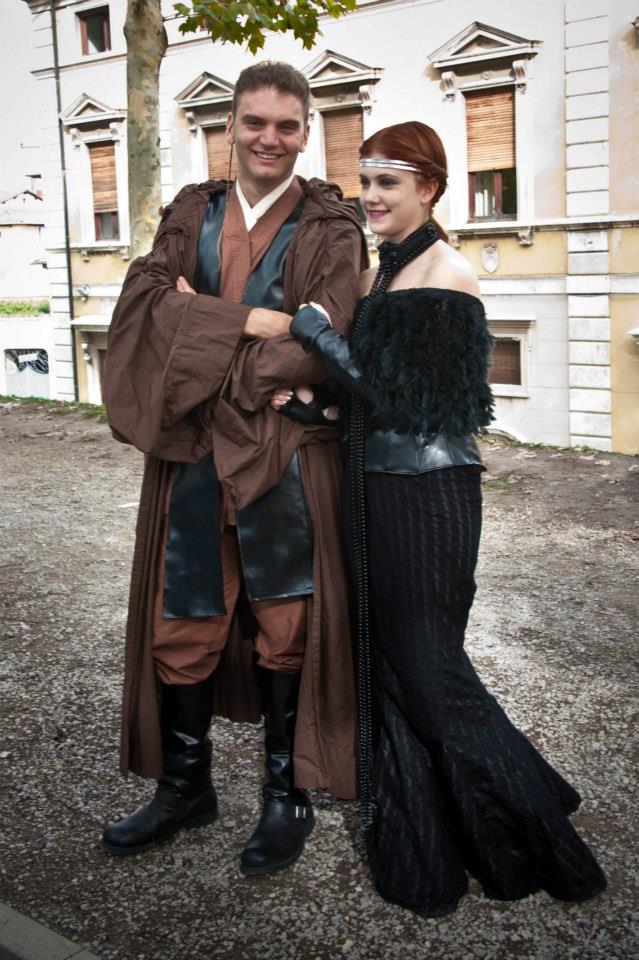
Here you can see me in 2011 with my very first cosplay experience. Below you can see my first self-sewn attempt, in 2011.
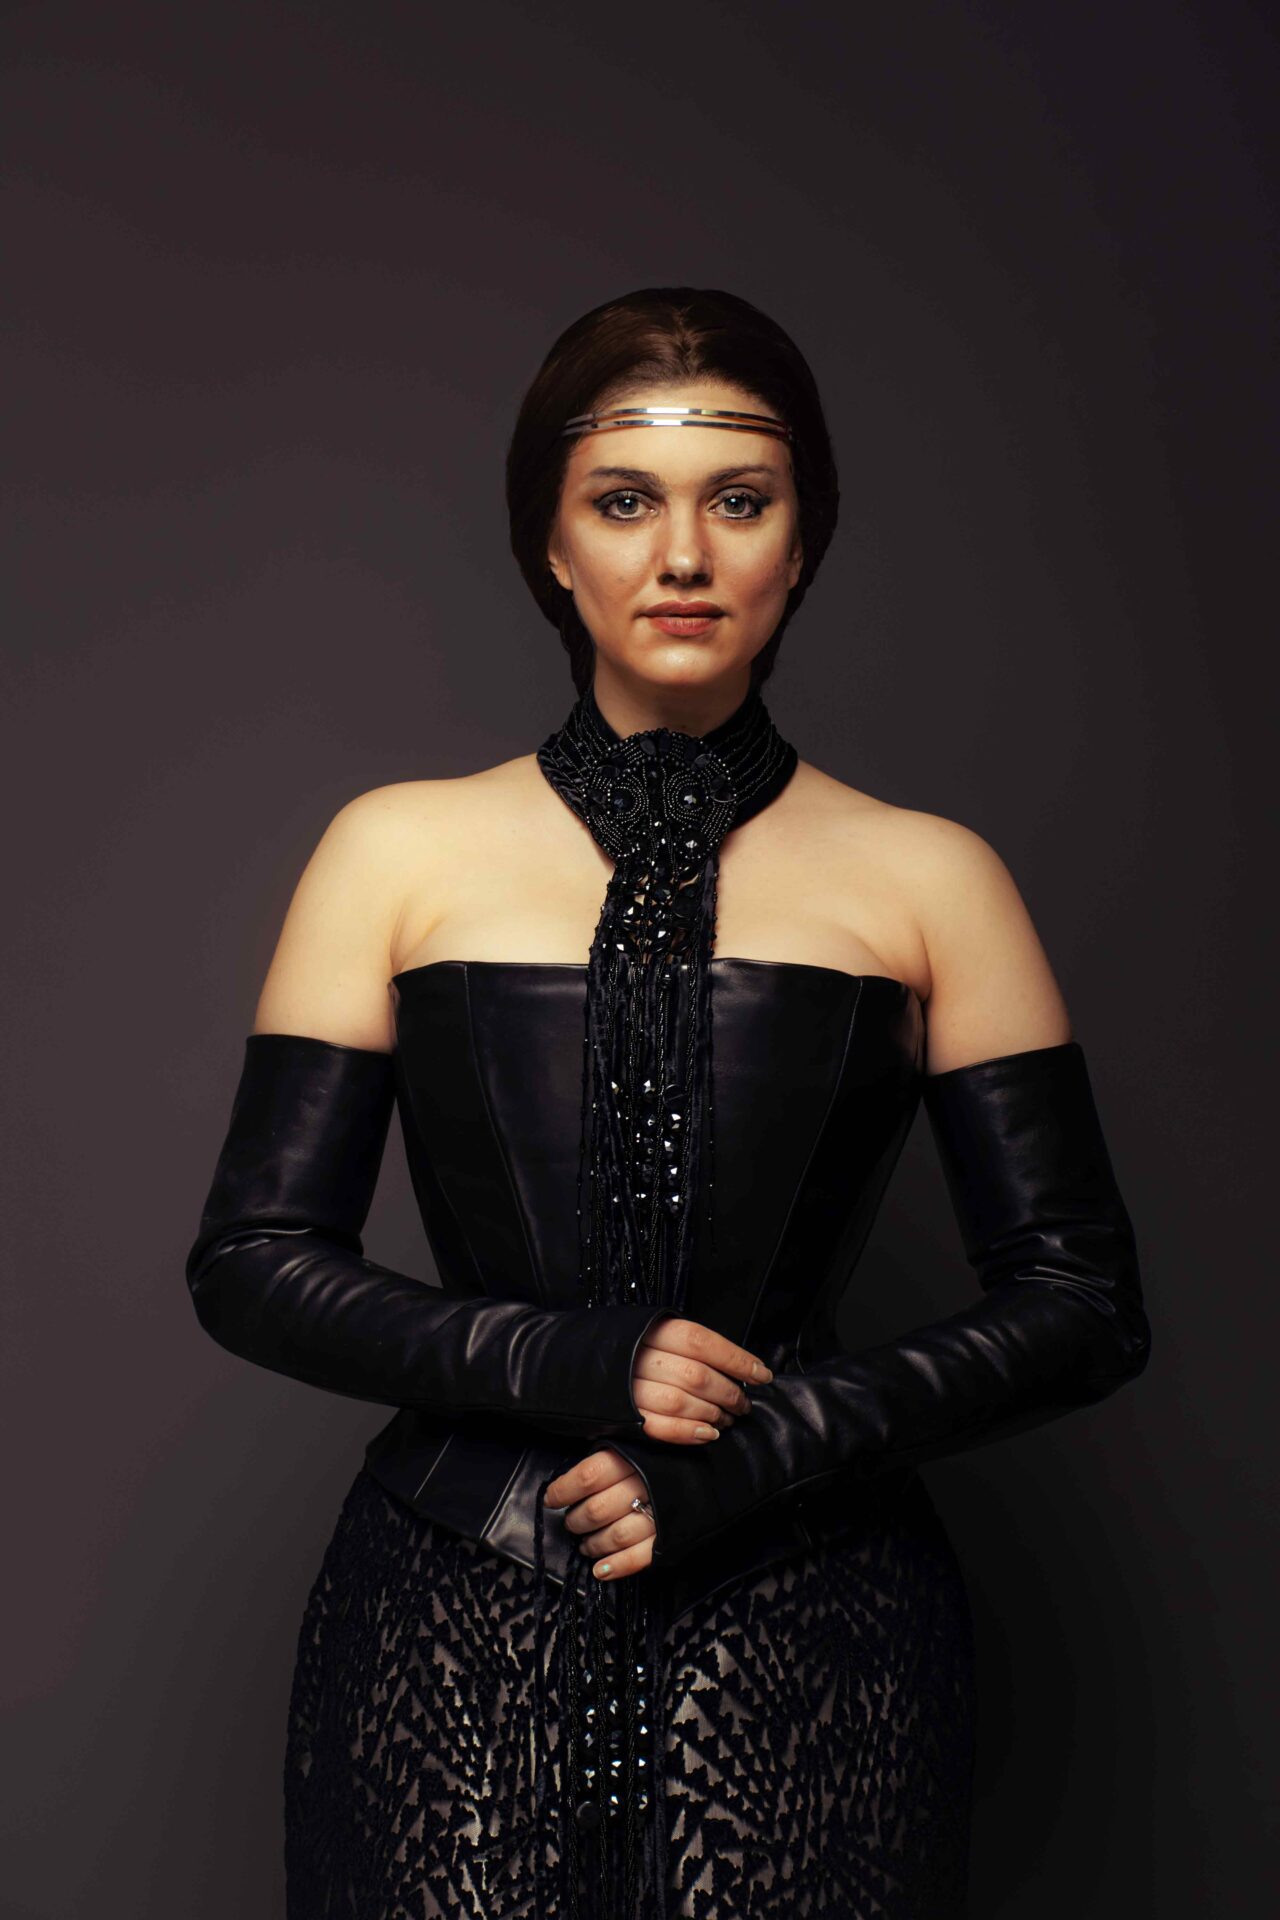
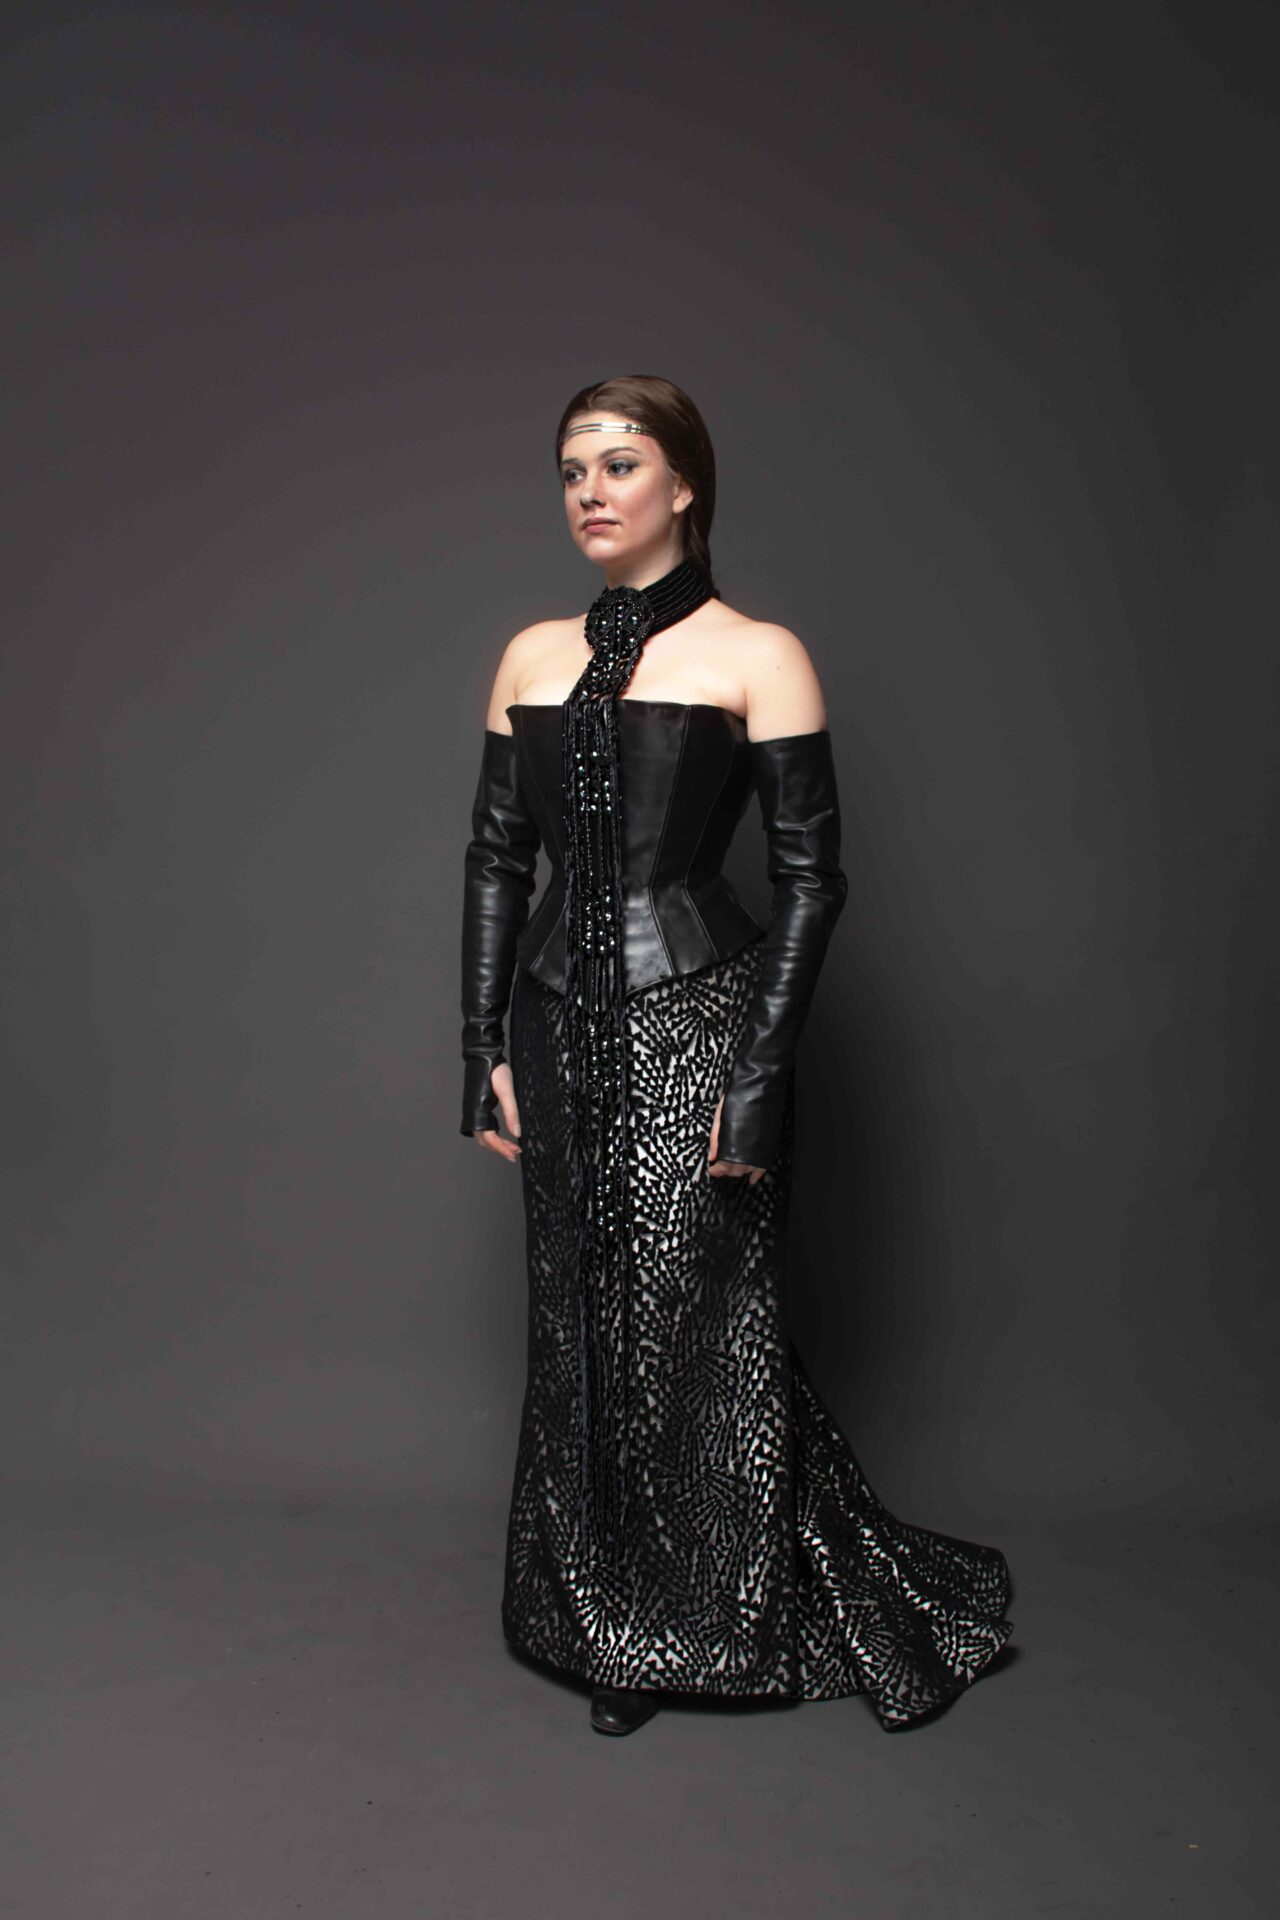
Here you can see my costume in 2023.
I also made the shawl, but I have ended up making only a couple of reels and no photos yet.
This will not be a full tutorial, just the costume analysis. I will share what I know about the original costume and guide through what I have learnt by doing it wrong two times.
I will not share how to create one yourself, how to assemble it or how to draft the pattern and source the materials. That is usually what fills the dozens of pages of the full tutorial!
However the analysis style is a starting point that will be useful to anyone tackling this costume, even if you are not going to need the rest.
I admit I am quite proud of the result of my last version. Here you can see them side by side to compare.
Though we share the same height (shortness?), my body type and Portman’s are quite different. Our faces as well. So, considering those elements, for the moment I am pretty satisfied with the results.


When looking at photos of a costume for the first times, and also for the second and third… it’s easy to miss details. Especially about proportions and especially if you are not experienced in recreating dresses. It’s only natural! And this is why I trust this post can be very helpful to anyone doing this costume, as it lifts some weight from your shoulders and assures you everything is in place, every part is described, every detail mentioned.
Over the years, together with my two attempts, I have seen many cosplays of this outfit. I have tried to keep track of all common mistakes (mine included!) one can make. I know far too well how infuriating it is to work on a dress for a while, only to discover at the end that proportions are off or a piece is missing. Parts that you may pay attention to, in the images of the original, only after making it once…or twice.
So I have marked all these things in bold, so you know they’re tricky elements to be very careful of.
Let’s start!
This outfit is composed of:
- a double headband worn on the forehead, in silver color;
- a black beaded necklace;
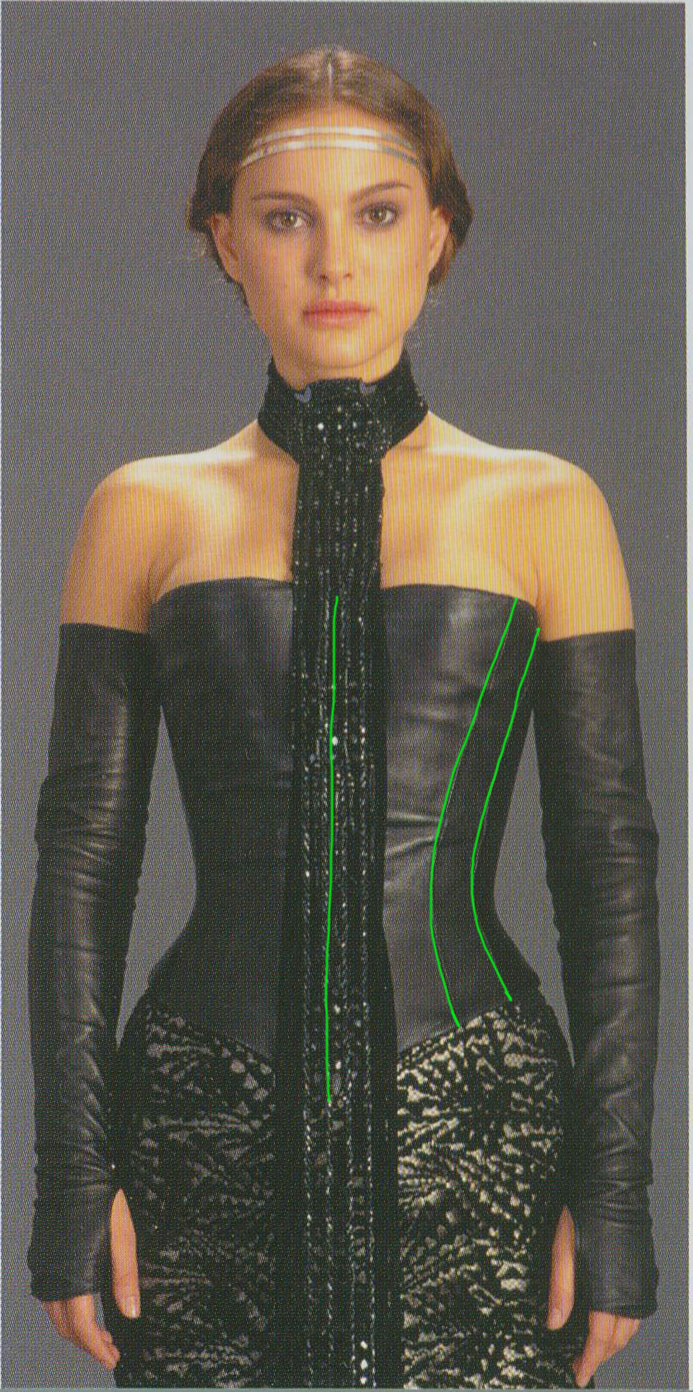
- a black leather bodice with a dramatic conical hourglass shape;
- fingerless black leather gloves;
- a mermaid or fantail skirt in silver grey satin overlayed with black chenille lace with a geometrical pattern of triangles.
- an off-shoulder feather shawl
This hairstyle features both Portman’s natural hair and extentions. The hair is parted at the center, comes down on each side of the forehead and starts twisting at the ear. The twisted hair from the two sides joins at the center of the nape of the neck, in a common braid. Over that, a roll of coiled hair, thick as a thumb, is twisted around and reaches the end of the braid, turns around it and comes back. The braid ends at the height where the armpit line ends and the rest of the hair is curled gently. If pulled down, the hair below the braid would reach the waist. The loose hair section is as long as the braided one.
Portman’s hair is not dark brown. It’s a full chestnut color that becomes lighter and more golden after the roots. Here you can see it. Not coffee or dark chocolate brown! I made this mistake plenty of times. This really helps you noticing where fake hair was used! It’s so incredibly helpful. In the photos I have added to this section, for example, you can see that they started adding fake hair just beside the ear. This probably helps with the thickness of the twists as well!
No elastic is visible, though there’s probably one at the nape of the neck and one at the end of the braid. Or bobby pins or whatever is secuting the style in place. I like elastics. If present, these devices are both covered with the coiled extension roll.
The headband is worn so that it is not seen passing over the hair, just the skin. The hair at the sides of the forehead is carefully combed to achieve this effect. I would say the tiara it’s 4 to 5mm thick on each band. The width of one band and a half separates the metal from the center of the hairline (this really annoys me on my own, because my forehead is much much lower and I can not keep that proportion successfully).
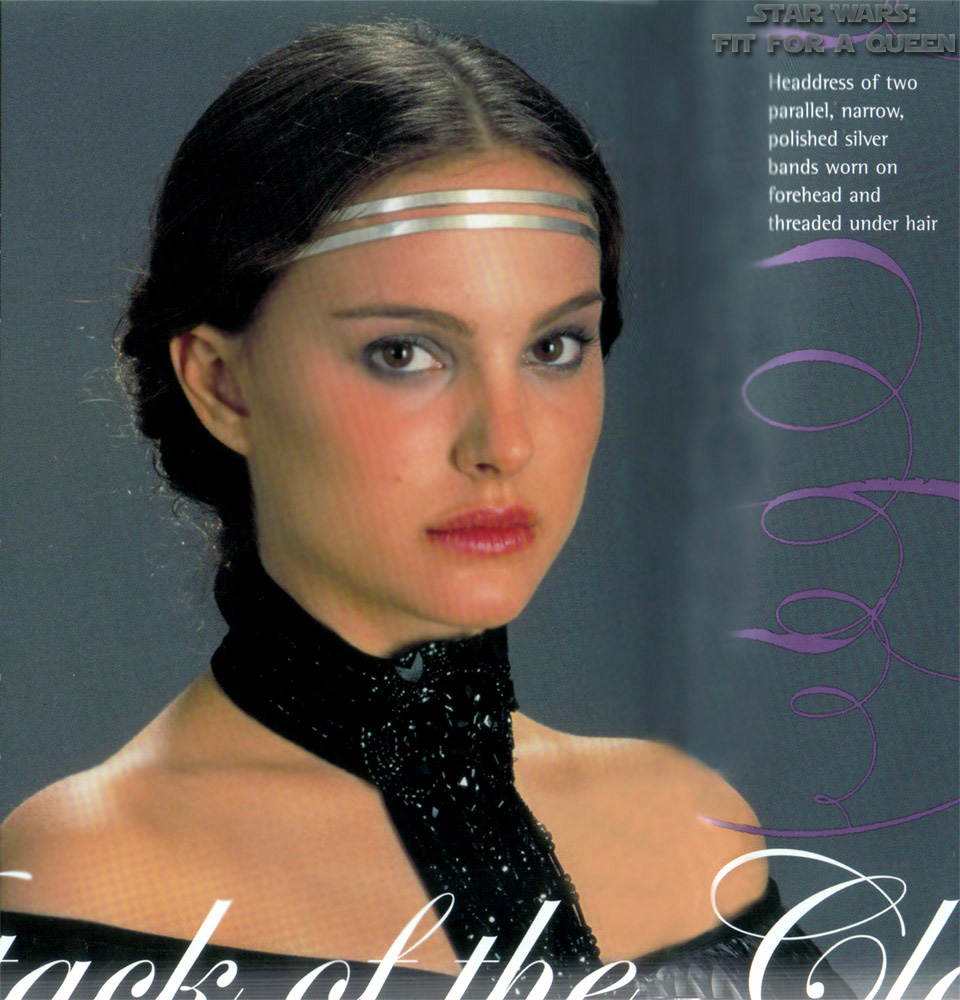
It is said that this choker was once a 1970s belt. Well, even though they found it already made and just added things, we have to do it from start. So let’s see what we need.
Collar
There is a velvet collar, gently curved, not straight, so that the medallion seats on the jugular dimple and the shape adapts to the base of the neck. The velvet does not look like silk velvet, it’s more dull, less black and doesn’t have the same shine at the edges.
It closes at the back, they say, though I like mine closed under the medallion.
On each side it is embroidered with 6 rows of short, cylindrical black beads. The space from the top and the bottom of the collar and the first and last row of beads is slightly wider than the space between two rows.
Medallion
The medallion is as wide as the two eyes of the wearer, from outer corner to outer corner, and as tall as the distance separating the inner corner of the eyes and the upper lip.
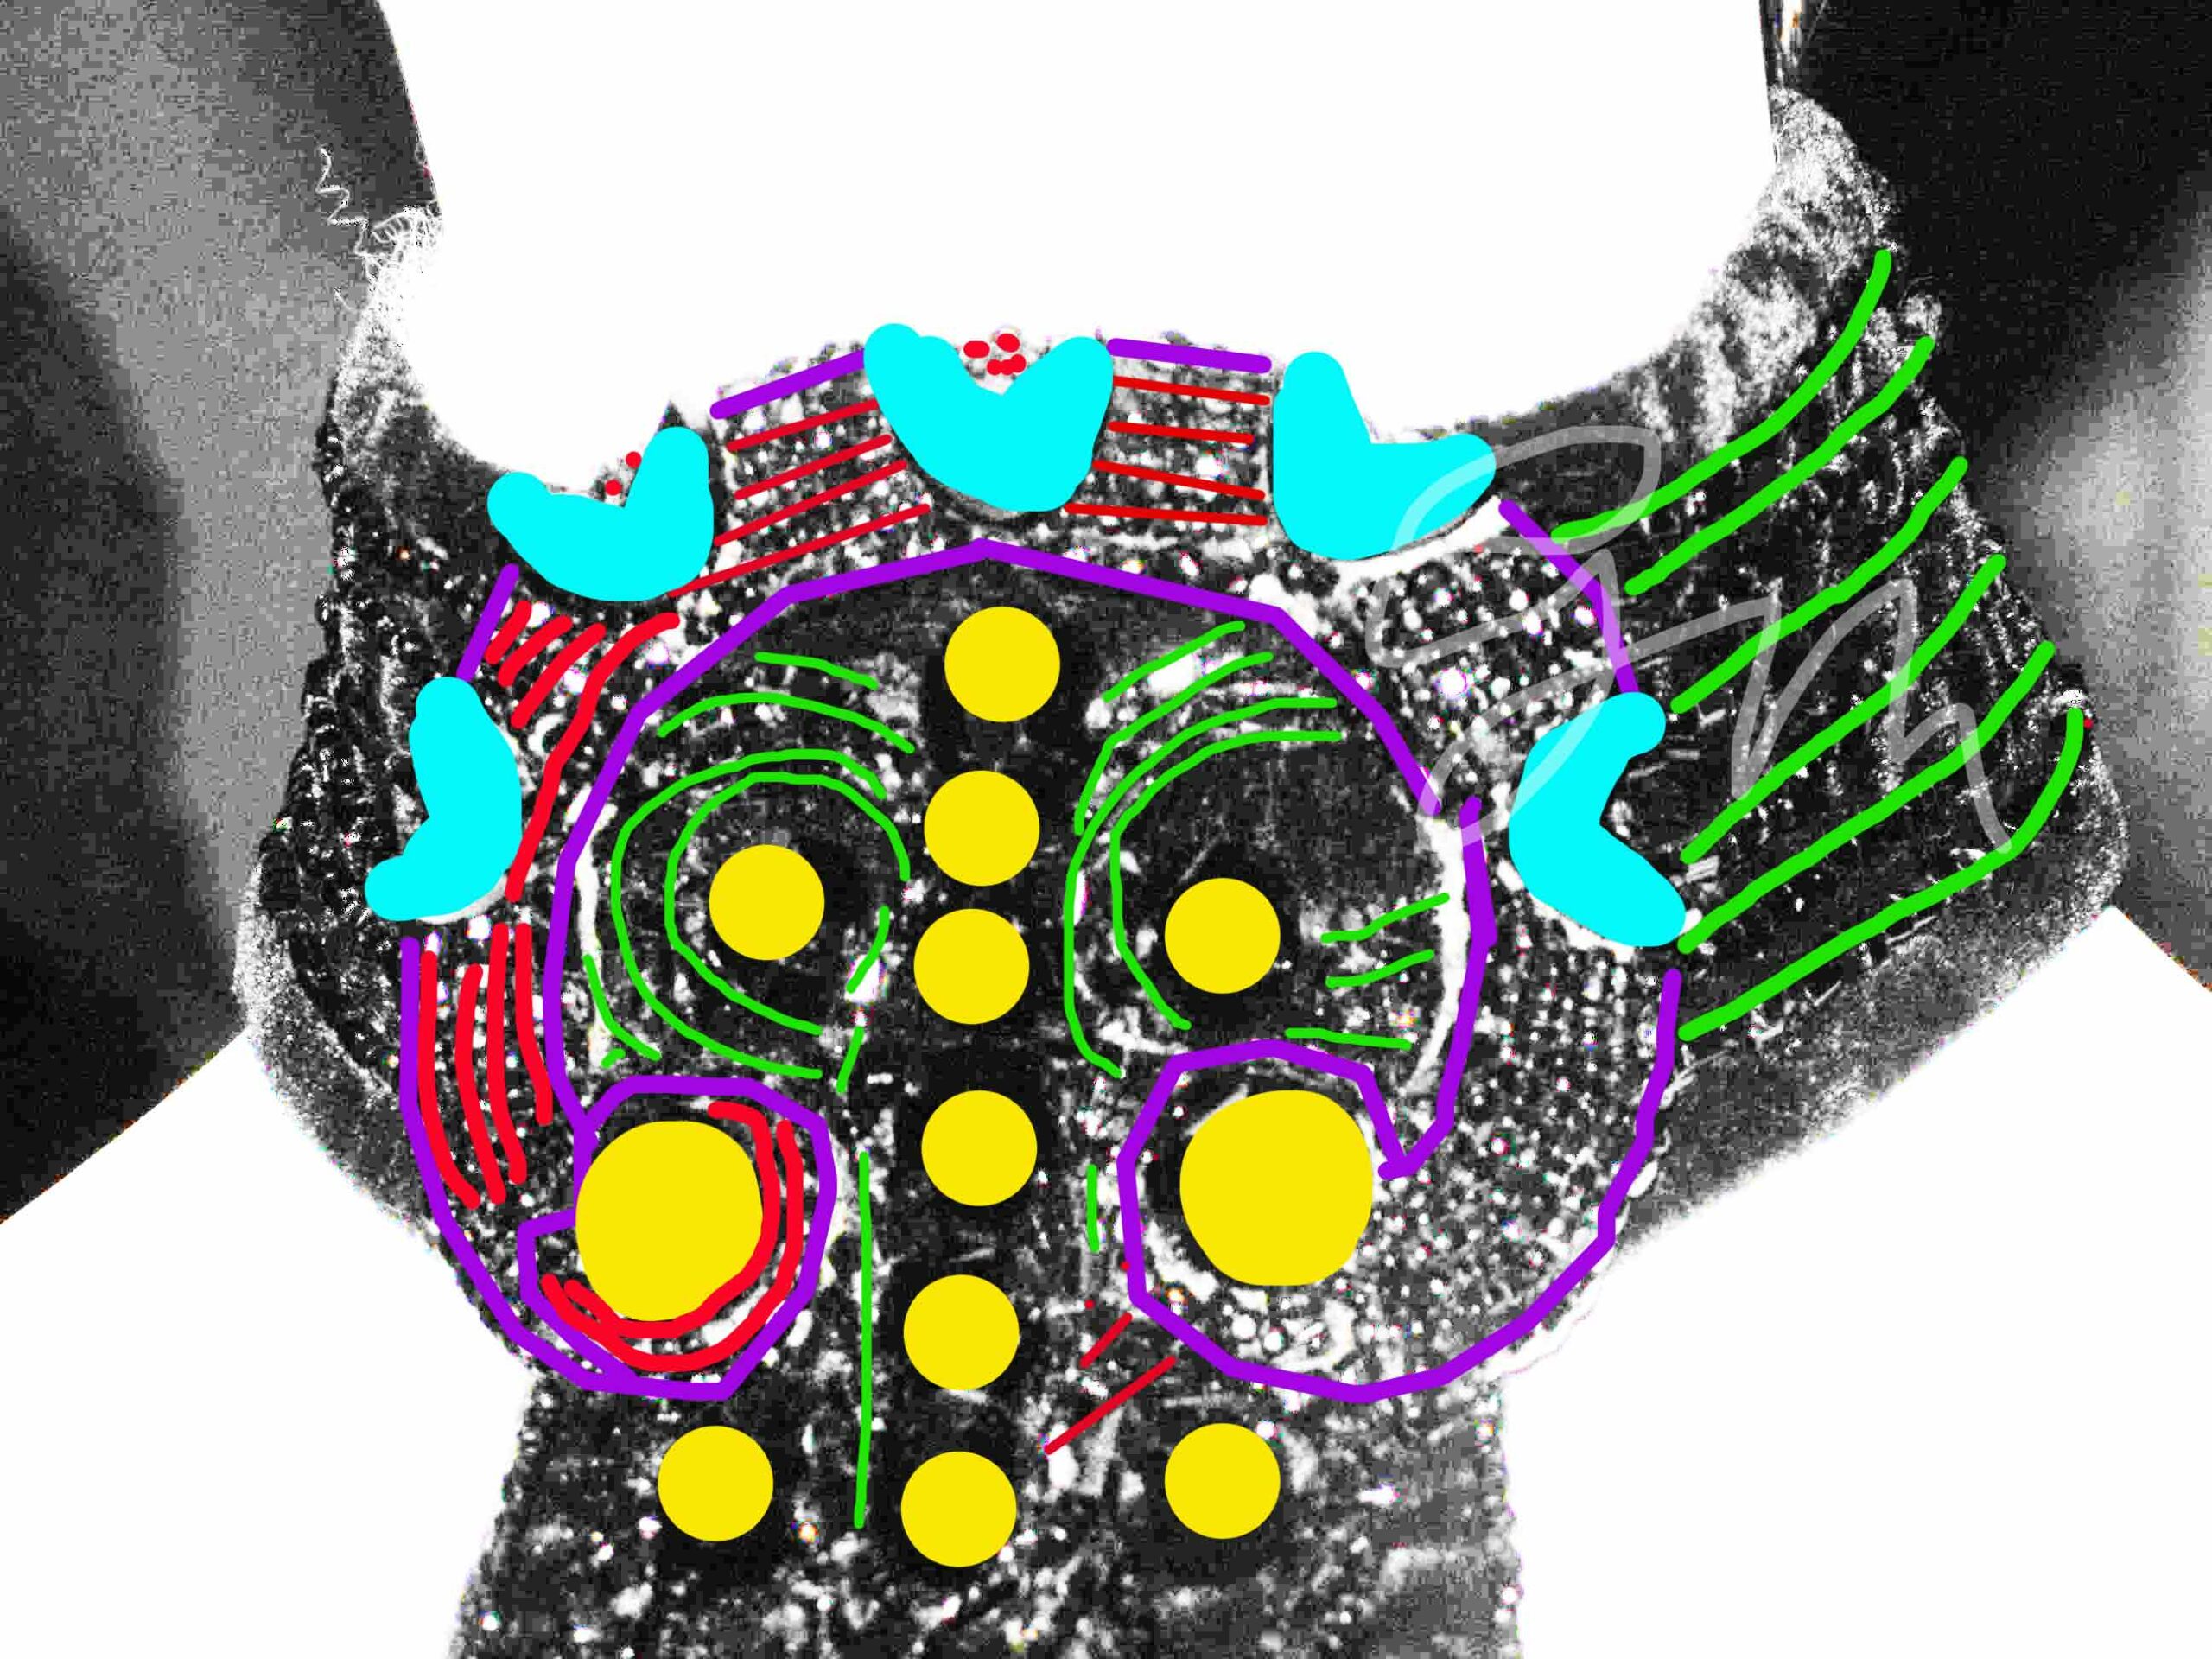
It has a sort of downside C shape, each side curling inwards. It is beaded with normal black seed beads, and crystals. The two larger faceted round crystals are at the two ends of the C, the others are aligned in a sort of cross at the center. 5 V shaped crystals are placed on the top of the C. The distance between each of them is less than the distance between the last of them and the larger round ones. The C is made of 5 rows of smaller seed beads and edged with two rows of larger ones. The smaller seed beads surround the two crystals at the “arms” of the cross in a C and reverse C shape.
Personal opinion: here it depends on the accuracy level you like, but a similar visual effect can be achieved even with a less precise design.
Fringe
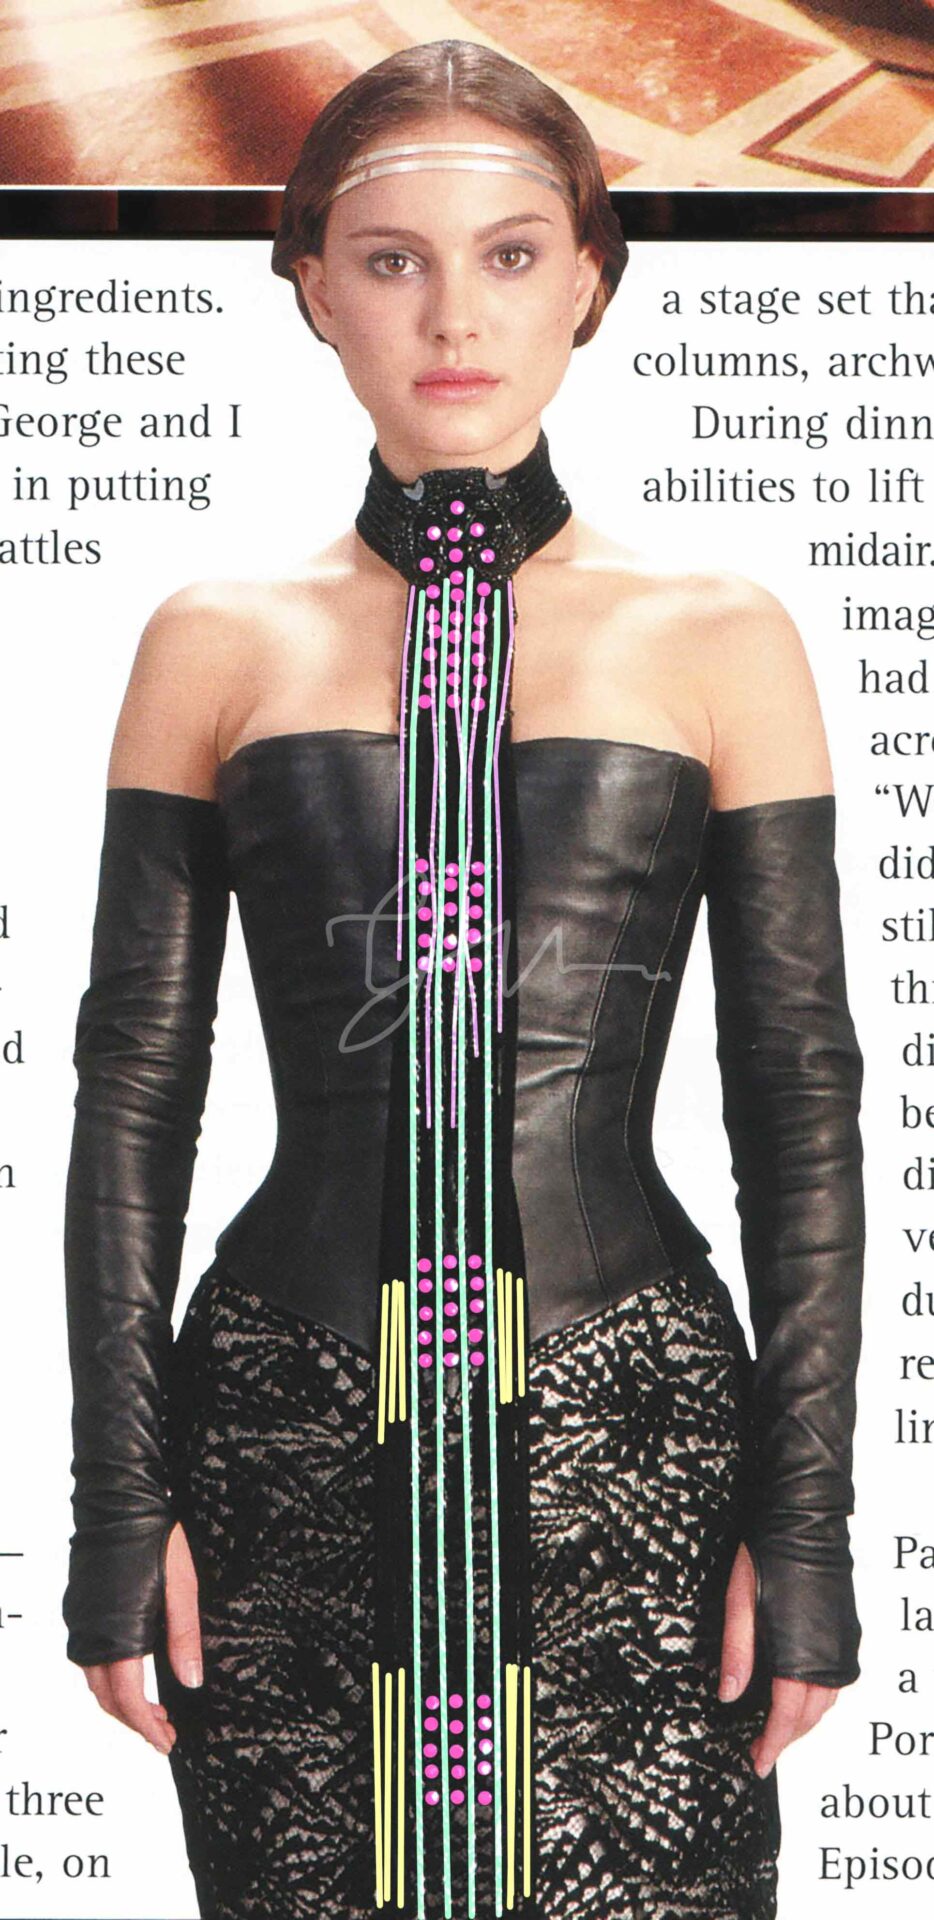
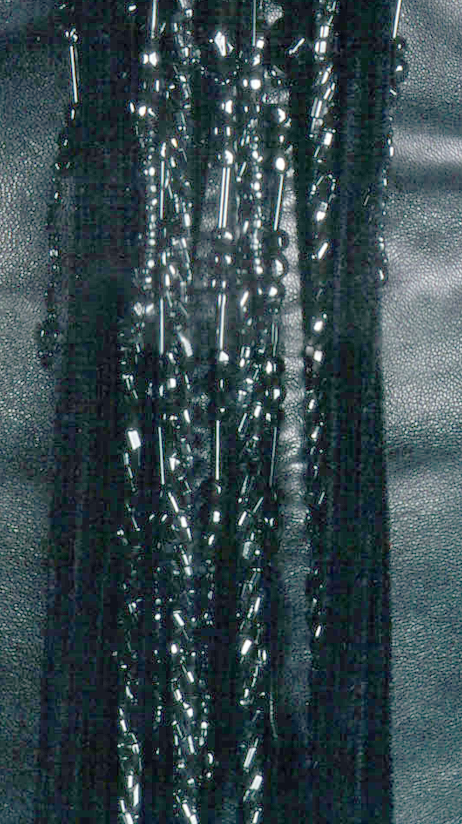
From the lower side of the medallion there’s a long fringe of beaded threads coming down. Each thread has a distinctive structure. On each side there are 3 chenille strings (maybe 4). Between the two chenille sides there are 4 pairs of threads of cylindrical short black beads, twisted to create a cord with each pair. These reach just above the malleloli. Between the four beads cords there are sections of round black faceted crystals like the ones of the medallion. They are sewn to the cords to keep them in place. There are 4 or 5 sections of 5 crystals sewn on each side to the twisted beaded cord, creating rectangles. Each rectangle is made of 15 crystals. These are quite fundamental in keeping the necklace from tangling! I have seen 5 in a photo, but I don’t remember which one. They are hard to detect among the pattern of the skirt lace.
At the top there is a short fringe of long bugle beads sections interrupted by clusters of 3 round beads, the center one slightly wider. These are on the sides of the twisted cords as well, and in between, though they all end between the bust and the waist. The center ones are longer.

“Conical hourglass” is an unusual definition, right?
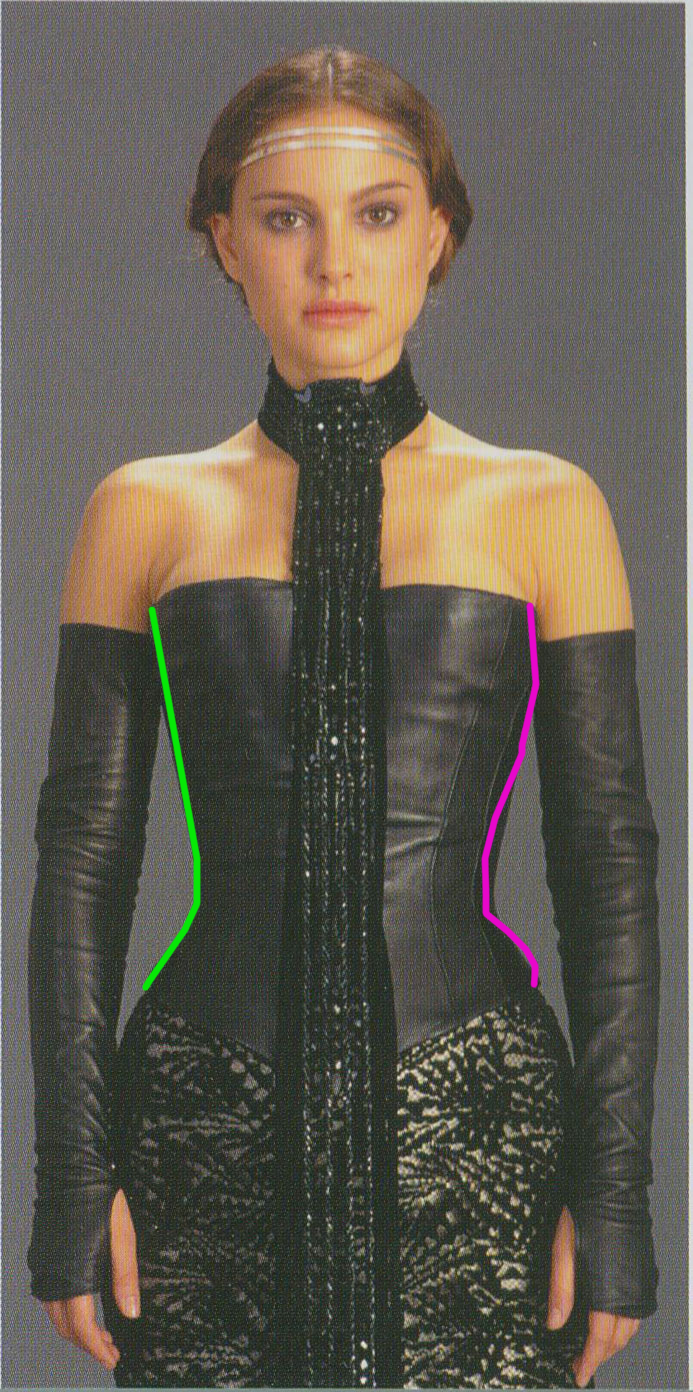
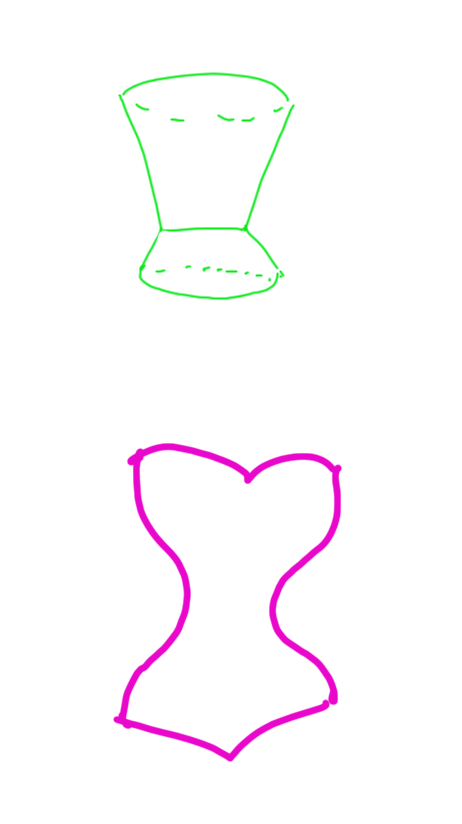
You imagine of course the normal hourglass, one half globe facing the other. But this is not the case, why? Because the sides are straight. Except for the negative curve at the waist, the sides are straight. And I will tell you even more: the widest point of the corset is the top edge. Like a cone. It does not end up with a sweetheart line or comes in so that the widest part of the bust is lower than the end of the corset. It is just a cone. The curve top is because the necklace keeps the middle close to the sternum.
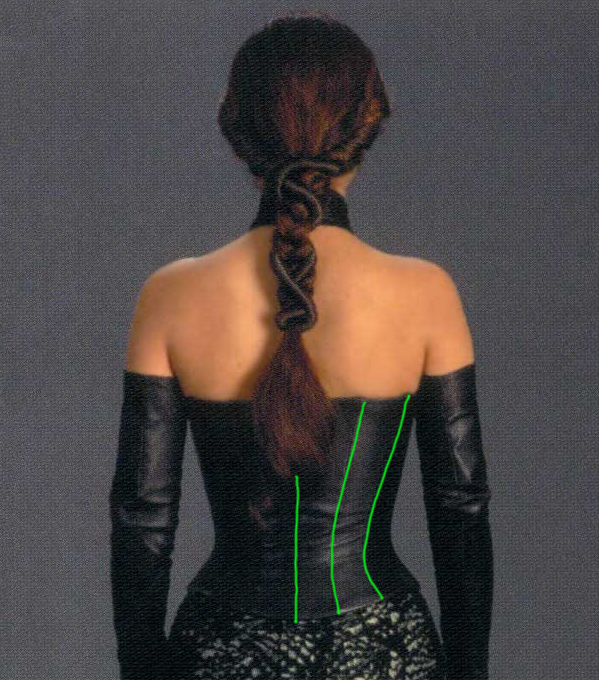
The bodice closes at the front, under the necklace. There is no back closure visible to us.
The green line on the drawing has the same shape of the picture, while the pink one doesn’t. But how to keep the girls in place? Well, you need a corset underneath. Which is also what gives you the shape, allows you to lace and shape up, and get that distinctive silhouette.
In these pictures it doesn’t always show, but when you see Portman moving in Episode II you can clearly see her waist is super tiny. And from the costumes showing her navel we know that is not her natural shape. And we know she’s super thin and Hollywood fit. So, if you want to be accurate, even if you’re skinny, you can’t skip the corset and just go with your natural body shape. No matter how naturally pronounced your waist is or how firm your chest. Your bosom will always be in a round shape, not with a straight side and a curved top like hers. That specific combination of shape and bust shape is only given by a corset.
This also allows you to have an hooks and eyes or zipper front closure and the shape at the same time, because the lacing is on the corset, and with just a front busk and no lacing there is no way you can achieve the same effect.
If you are looking for a corset that is designed to achieve this exact effect, have a look HERE, to get one that is just as the one I used under this dress. Made to measure.
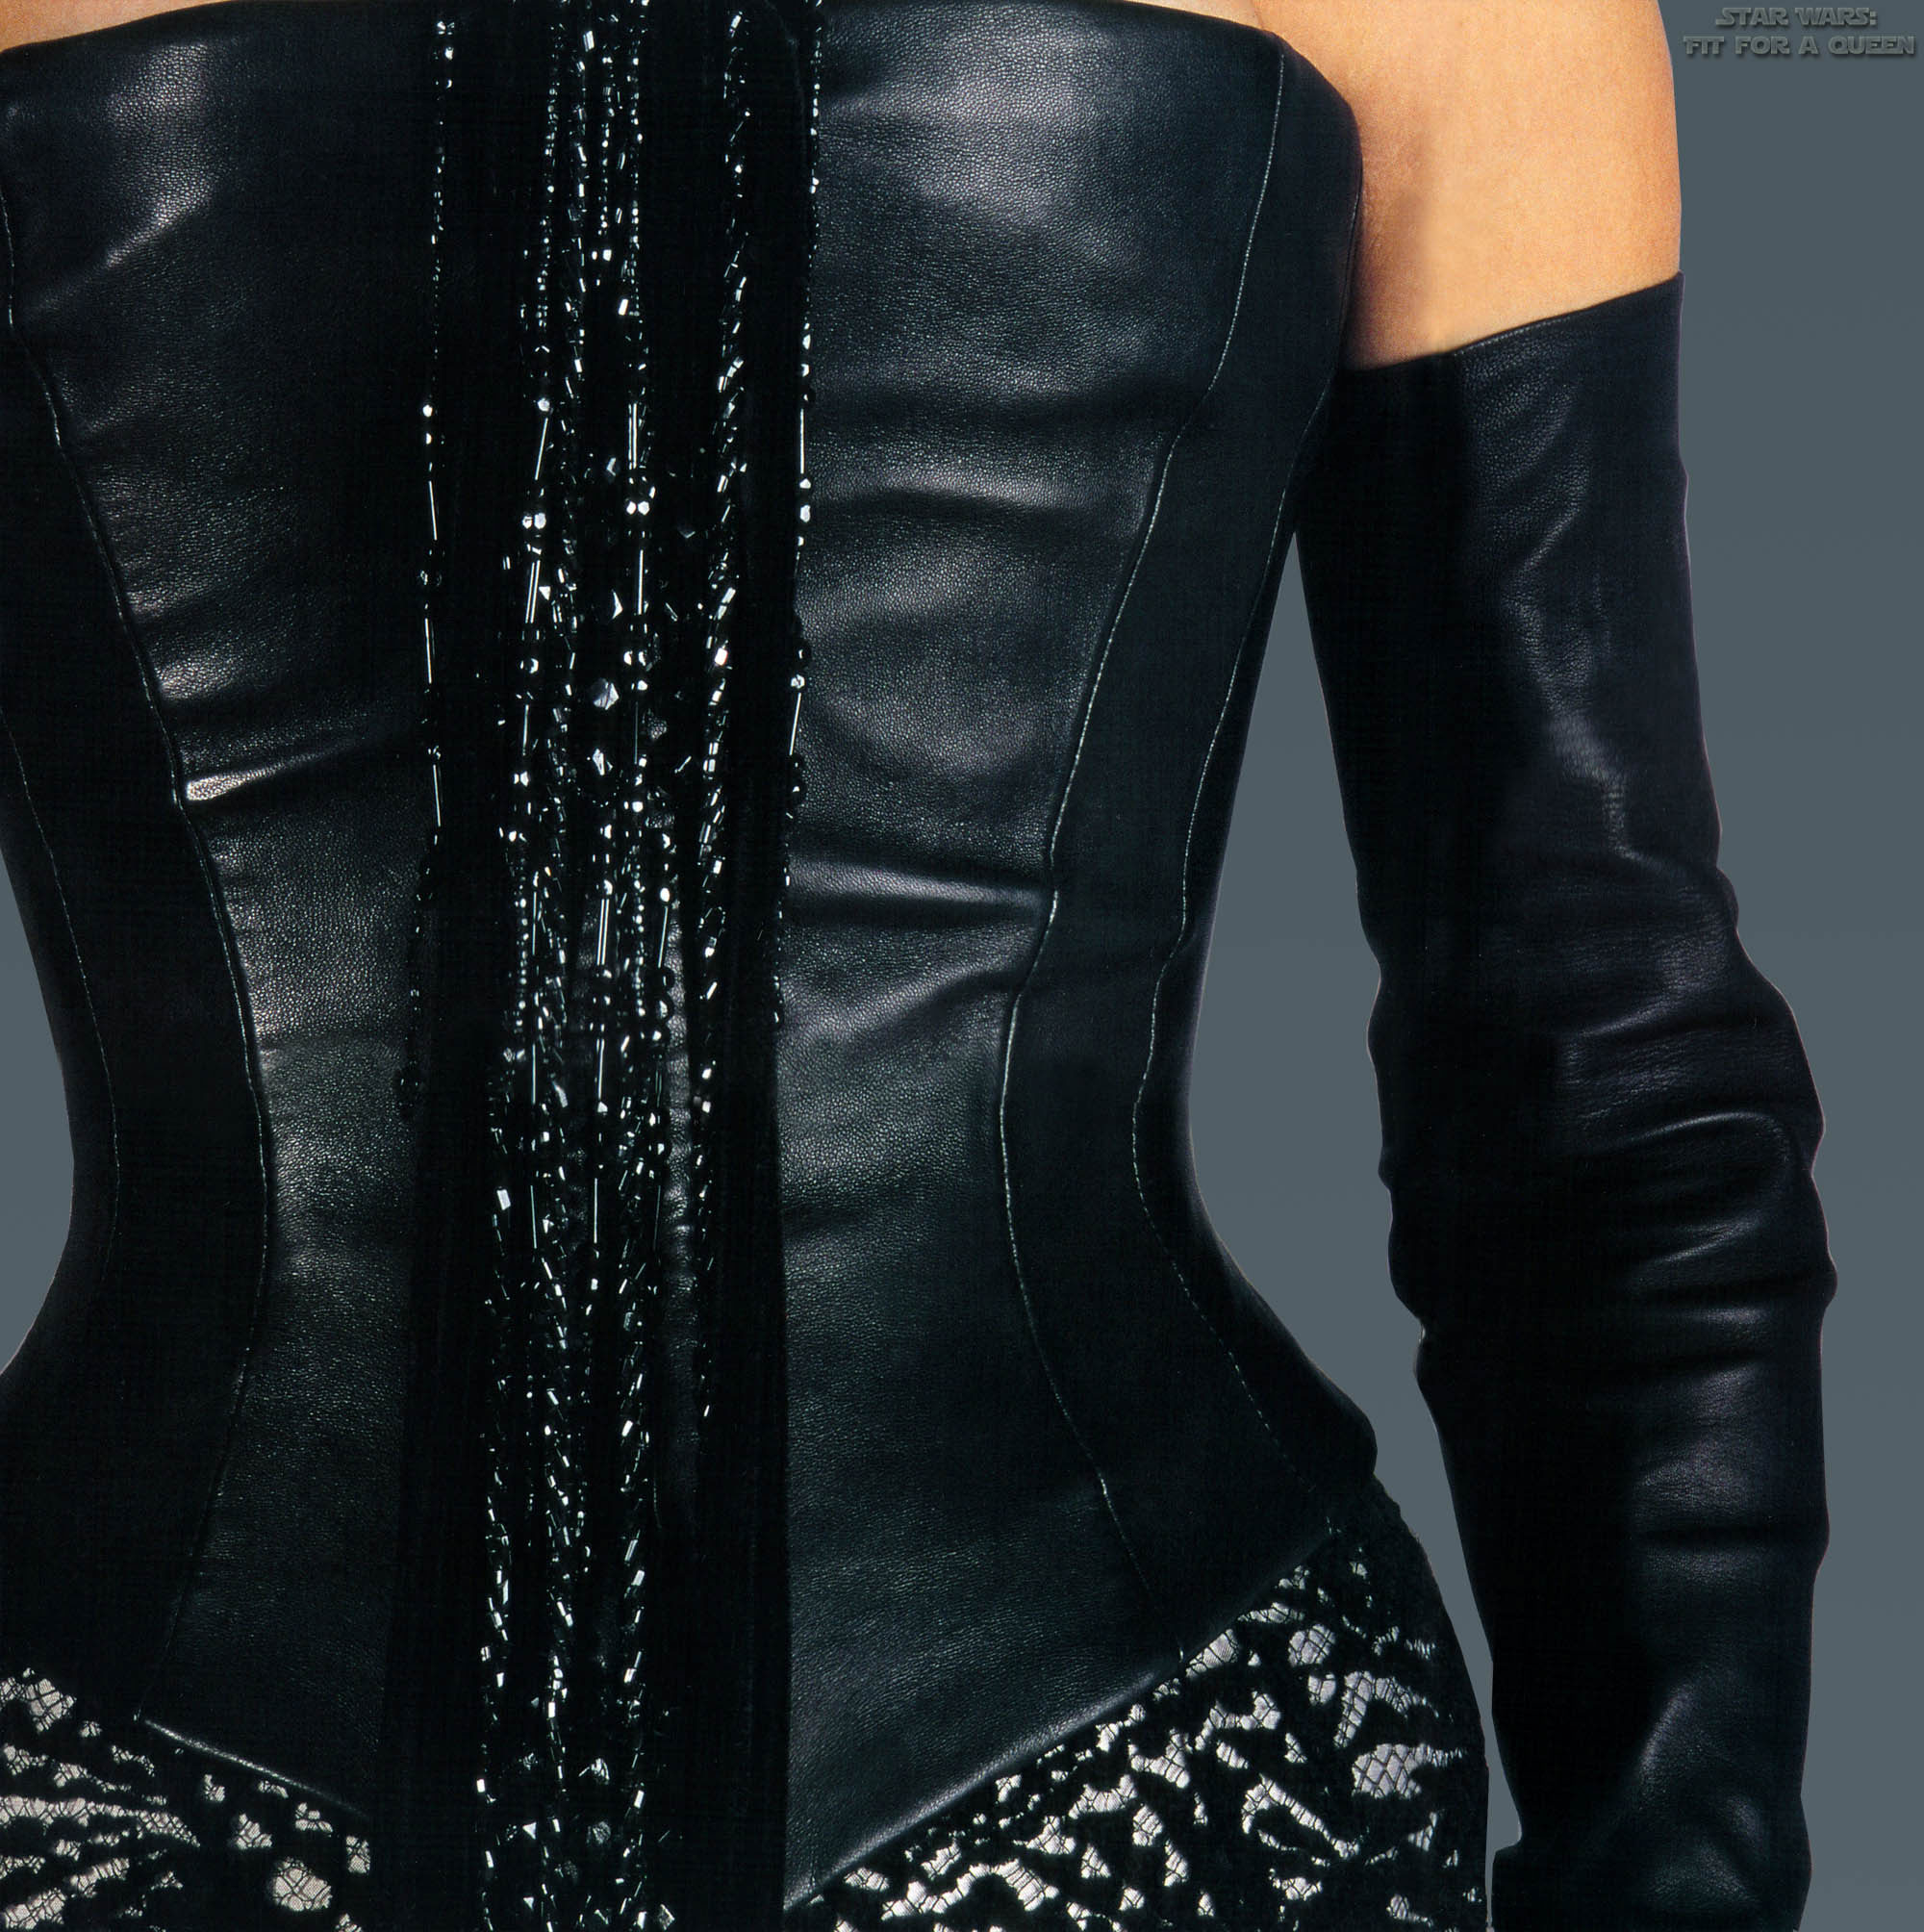
But let’s get back to the bodice. It’s in a semy-shiny, natural texture soft leather that slighlty creases over the corset base (hence it is not boned itself, you need an other garment to provide the structure). There are no visible boning channel seams in the whole garment.
It is made of 12 panels, 6 on each side, 3 at the front and 3 at the back. The panels are not straight, but curve following (creating) the shape of the garment: top and bottom straight, the waist curves. The center ones are much wider than the side ones and the back ones.
The front of the corset has a nuanced V shape at the bottom, and it ends just a t the highest part of the hips on the sides. At the back it is lower at the center and has a curved shape.
While at the front the top bodice edge is higher than the gloves, at the back the bodice ends lower.
There is no topstitching in the whole garment. The top and bottom edges are folded back, probably sewn to the inner seam allowances, glued to the inside, or folded over the edges of the corset underneath.

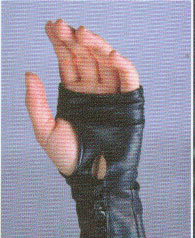
The gloves are made in the same material as the bodice. The top is folded back as the bodice, with no visible seam, the bottom is finished with tiny piped or folded edge of probably thinner black leather, or the same, sanded at the back until thin enough to adapt to the technique. Black buttons close the wrist. There is probably just one seam at arm level, but there appear to be more, shaping the wrist.
More than gloves, these are mittens, as there is no separation between the fingers, except for the thumb, which has his own hole, piped. And these mittens are high. Proper full opera length, not midway across the arm. They want to get to your armpit very badly, and end up just a few centimeters below the top edge of the corset.
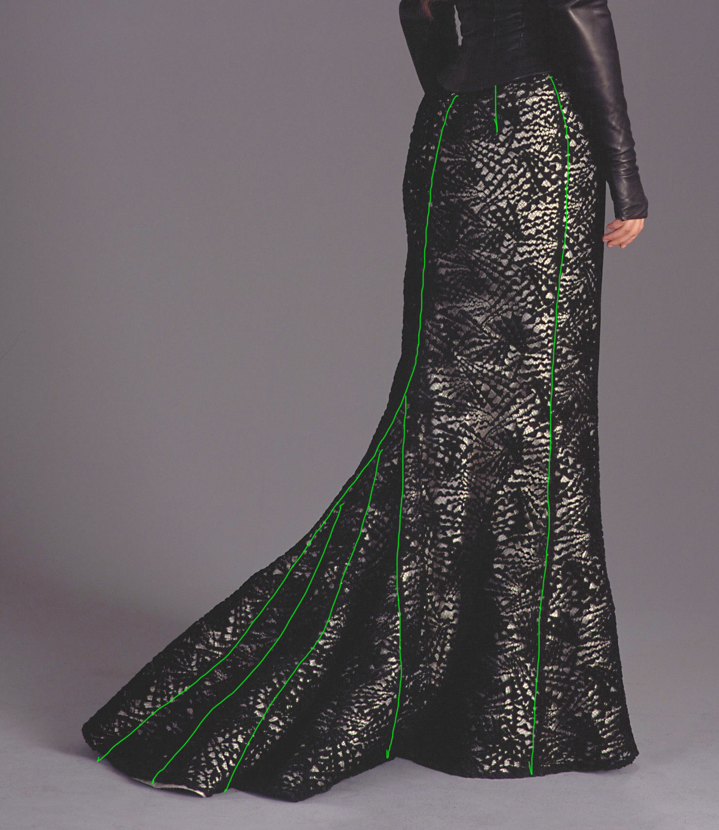
The skirt is figure-hugging from the waist to the widest part of the hips. Then it falls down straight until the nees, where it widens in various ways. It could be closed to the side or at the back, with either hooks and eyes or an invisible zipper. Or even sewn on, as sometimes it is done, for movies and tv series (Talking of you GoT).
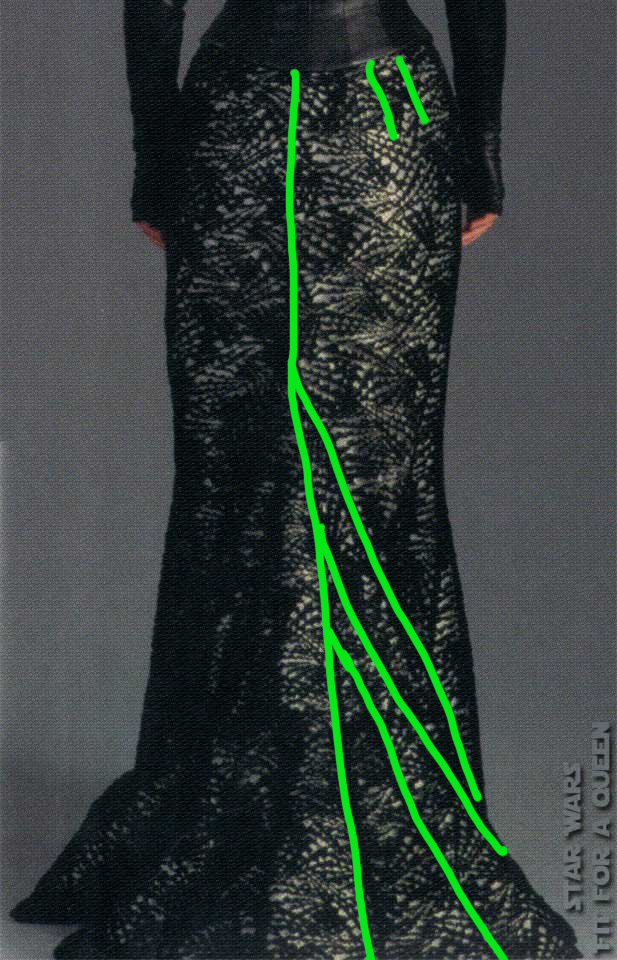
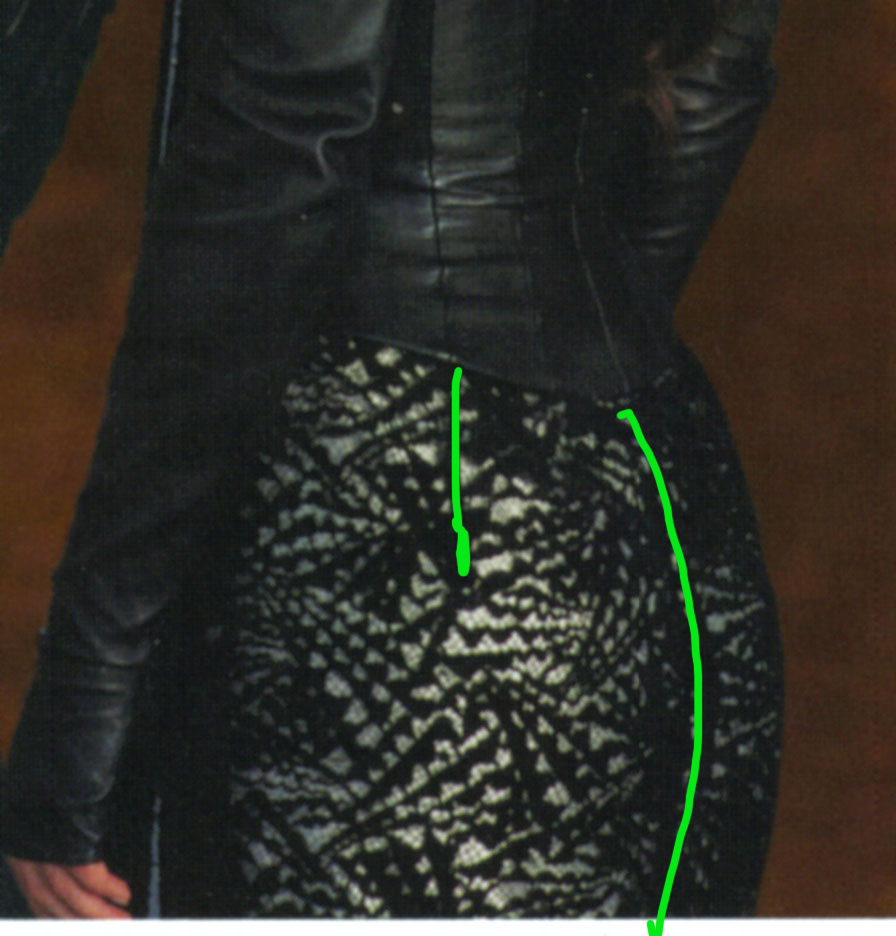
It is made from a light grey satin (not sure, could be taffeta to give structure, could be something else entirely, it is not super shiny, not entirely matte) fabric, overlayed with a beautiful chenille (velvety) lace with a pattern of triangles arranged in fans. Which makes seeing the seams between panels quite hard, so in these images you see with the green lines over the picture have a bit of supposition and not just evidence.
There may be two panels at the front, with the necklace concealing the seam, or maybe it’s just one. Then there are surely two at the back, likely with darts going from the high hips to the waist. These four base panels flare out from the knee to the bottom. Between the two panels, at the back, there is a train composed of triangles, opening from the center seam. Thefirst two start higher than the back of the knee, but not just below the buttock (avoid the fart-train effect please). The others start at the knee.
There is a petticoat or a dust ruffle, and maybe even horsehair braid at the hem, to keep everything in place.
The train is present, and is quite wide, but it is not as long as it seems at first. You may want to calculate with mathematic proportions how long yours needs to be, according to your height, to avoid ending up with a skirt too long or too short.
Again, no visible topstitching.
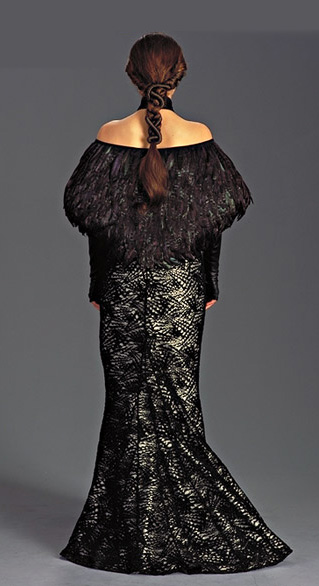
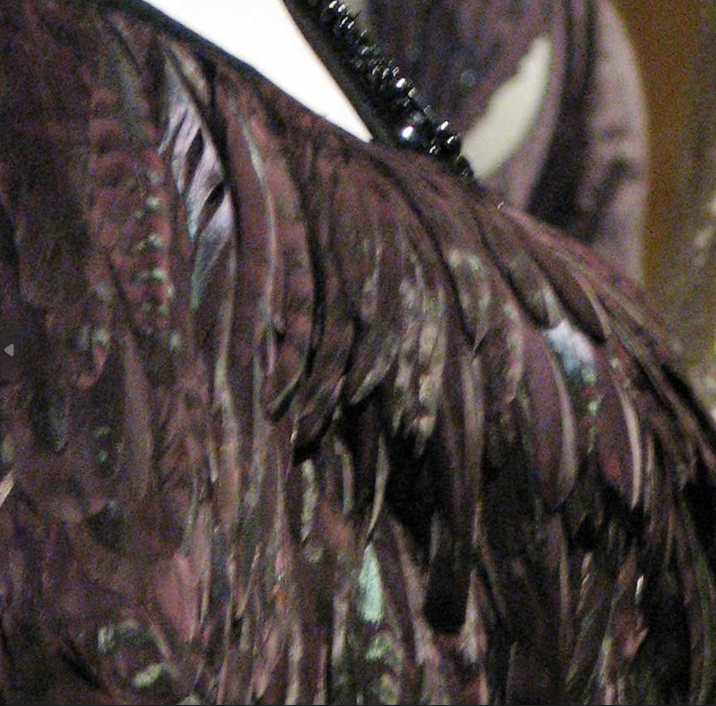
Then we have a shawl of feathers. It is off shoulders, closes at the center front underneath the necklace fringe. It covers the bodice completely (and barely, at the bottom front) and it is lower at the back. It is slightly higher than the elbows at the sides and the two sides create almost a 90° angle, if continued. The top seems to be bound with bias tape. It is not as shiny as satin would be, nor as leather.
The feathers are not just rooster, and are not black. Not even rooster black/green! They are of chinchilla rooster, which means they’re mottled. They are in a coffe-purple color, with iridescent green sections, and they have various lengths, around 10- 12cm.

This is the first part of every costume I recreate: listing shapes, materials and proportions carefully, so I can have all the info later, when assembling and drafting.
Want to know more? Want to know how to draft your own pattern, fitted to your measurements? Want to know how to source supplies for everything? Want to know the techniques I used to assemble mine?
Then you’ll need the full tutorial!
Let me know in a message if you would be interested!

