In this article I will try to do a very hard thing: giving general advice on how to boost your costumey-looking historical dress. We all started somewhere, and as a self thaught person, I know it’s hard, at the beginning, to try to understand why your work doesn’t have that extra thing.
I am not giving specific information for specific gowns, just a list of steps that can easily help you to get to the next level with historical gowns, or if you’re a cosplayer who wants to make the historical version of a cartoon and is not familiar with historical undergarments and techniques.
I will add something every once in a while, covering different topics. In my opinion, a successful dress needs to get right the following points:
- skirt support
- bust and waist shaping
- fabric choice (amount, pattern, texture)
- pattern
- construction (stiff VS soft)
- fit
- embellishment
- accessories, hair and makeup
I am keeping it easy, I am keeping it basic, you might have heard of these things a thousand times, if you do historical, but this might be a helpful list of things to check, before you get out in a gown that costed you a lot of work, and that ends up disappointing you, when you expected it to have that “out of a painting” factor.
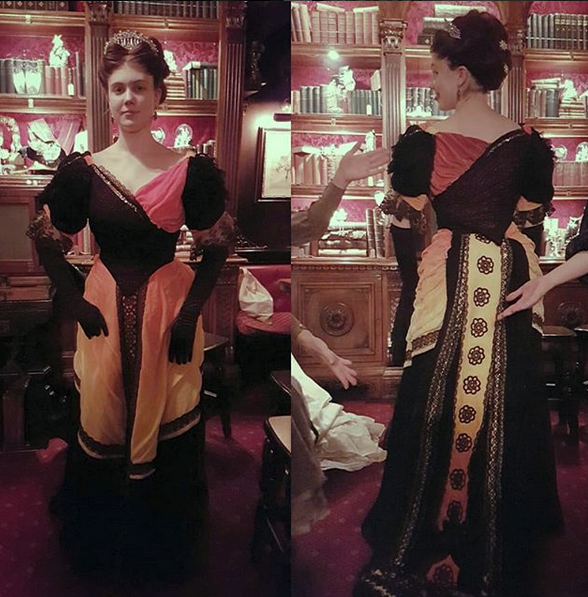
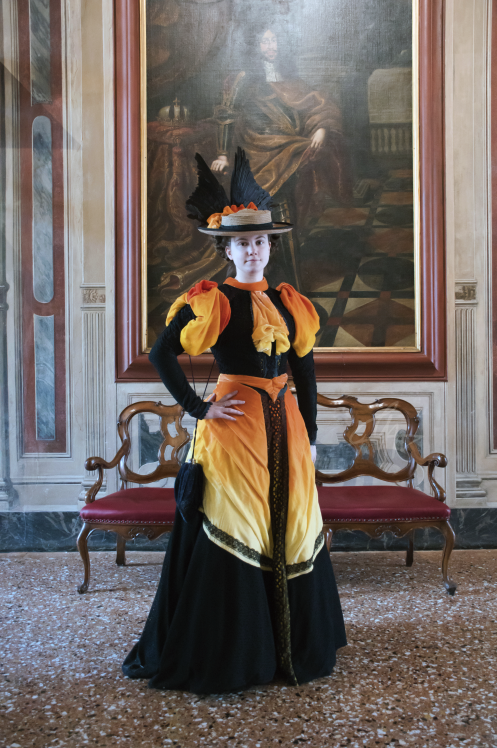
One of the easiest thing that can boost your dress is a petticoat. It is not a secret, but few beginners really spend time on this. The most experienced costume makers even add more than one petticoat to the same dress, to achieve the right result. If we’re talking of proper cotton petticoats or quilted ones, made with the right pattern with at least one reaching almost at the hem of the skirt, you can’t have enough of them. Of course, seven could be too heavy, and look very weird, but sometimes one is just not enough. And I won’t talk of tulle petticoats, as I don’t use them. They tend to look weird on historical. Go for cotton, it’s not expensive! Then experiment with linen and starch, cording, crinoline tape and other stiffening techniques.
What magic can petticoats do for you?
The magic of the petticoat is subtle, but to the experienced eye, the lack of it becomes abominable. Two crimes make a skirt look cheap: the “ribcage” effect, and the “cliff” effect.
Petticoats smooth the lines, they create that soft look, conceal what’s underneath and highlight the amount of fabric used. If you have a hoopskirt, it’s the petticoat that keeps your skirt from adhering to the cage like the skin of a sick person to the ribs (from now on, I will call this the “ribcage effect”), as soon as you start swirling on a waltz. Nothing screams “cheap fancy dress” like a noticeable hoopskirt and the lack of corset. The petticoat, the ones with a gathered flounce of a stiff enough fabric at the bottom, avoid what I call “the cliff effect”. It’s the effect of a soft skirt that falls vertical to the floor when it passes the last hoop. Like a weeping willow. You have that lovely bell line, you’ve padded your hips like a drag, you used your nice short petticoat or one without that lower gathered part, and then the edge of the skirt spoils it all.
I usually go with a long petticoat 5cm shorter than the skirt hem, and add a 25cm wide gathered band with a stiffened edge at the bottom of it. Then I add a second petticoat, shorter, to make the hips look full and to allow the fabric of the skirt to drape beautifully. Or I use a very basic quilted one, that makes this easier. It’s important that, if you have a very soft muslin petticoat, you have a heavier one underneath. Soft muslin is good to make the skirt have that fluffy and soft fairytale look, but on its own it brings you back to the ribcage effect, as it is not enough.
This concept not only works for hoopskirts, you can use it for everything. Skirt fabric adhering to your legs makes you look like you have not used enough fabric…even if you used more than the pattern suggested.
You can see it from the pictures above. There’s a huge amount of fabric on that skirt, and the overlays make it heavy, and the first time I only had the calf-length petticoat. The second time I had a proper one with a stiff lower part, almost to the floor.
The long flounced petticoat is a must every time you need the skirt to have a cone shape, a bell shape, or anything not exactly vertical.
Also keep in mind that adding volume to the skirt has usually the goal of making your waist look thinner. If you have a corset, and place the hoopskirt and the petticoat right at your waistline, you add volume to the waist. Therefore everything you add there, except for the skirt band, has to be a couple of centimeters lower.
I will skip on the types of support, like bustles, paniers and cage crinolines, that are too specific for every age.
Next is padding. Padding to the historical costume maker is as fundamental as for a drag queen. You need to pad, you need full hips, even if you think you have enough of a pear shape. Just a bit. Your pear shape goes down in a diagonal, even if you have a corset. You need it round. Padding allows a very nice angle at the waist, that will make it look even thinner, because of the contrast.
And padding was used. From bum rolls, false rumps, bustle pads, don’t fool yourself: use everything you need to achieve the shape in every age, especially if you’re planning a middle to upper class dress. Pad! They would have. They did.
Cherish that nice angle. It has to start at the waist, not lower, at the waist you need to get the skirt starting to open, you don’t want a gap betwen the waist and where the volume increases, you don’t want the hoopskirt shape to start four centimeters under your waist.
And last, but not least, get YOUR silhouette. I know chinese hoopskirts are cheap enough to make you love them, and that you think that every bustle should have the same volume, but nope. If you manage to get your hands on a book about historical undergarments exhibits, or even just spend some time researching in Pinterest, you’ll see that even in the same year they had different shapes for every occasion. Every shop had its own style. It’s hard to find two crinolines with the same shape, made witht he same technique, so try to get your own shape by widening or tightening the hoops of an industrially made fancy dress hoopskirt, if you can’t get the real thing.
And if you fancy that extra bit that no one will see, make your undergarments colorful. The movie all-white and nude fantasy is a lie, they’ve been doing that because of budgets and to get things off the rack. Of course white was there. But red petticoats, black bloomers, green hoopskirts and purple bustles, saturated corsets were there too, and they’re desperately asking for someone to bring them to life. Of course, avoid using them under white sheer dresses, but for all the rest, play.
Now we’re done with the petticoats. They’re somehow the easy part, when it comes to making a costume: they can be done with cheap materials, and they’re not seen, so you can rush things up, if you’re not skilled or don’t have time, and much of what goes on with the petticoat can’t be seen on the outside, as long as there is one!
The next step is the core of every historical garment, to me. Get this wrong, and all the rest will have a poor look. This is a hidden part too, but you can compromise less.
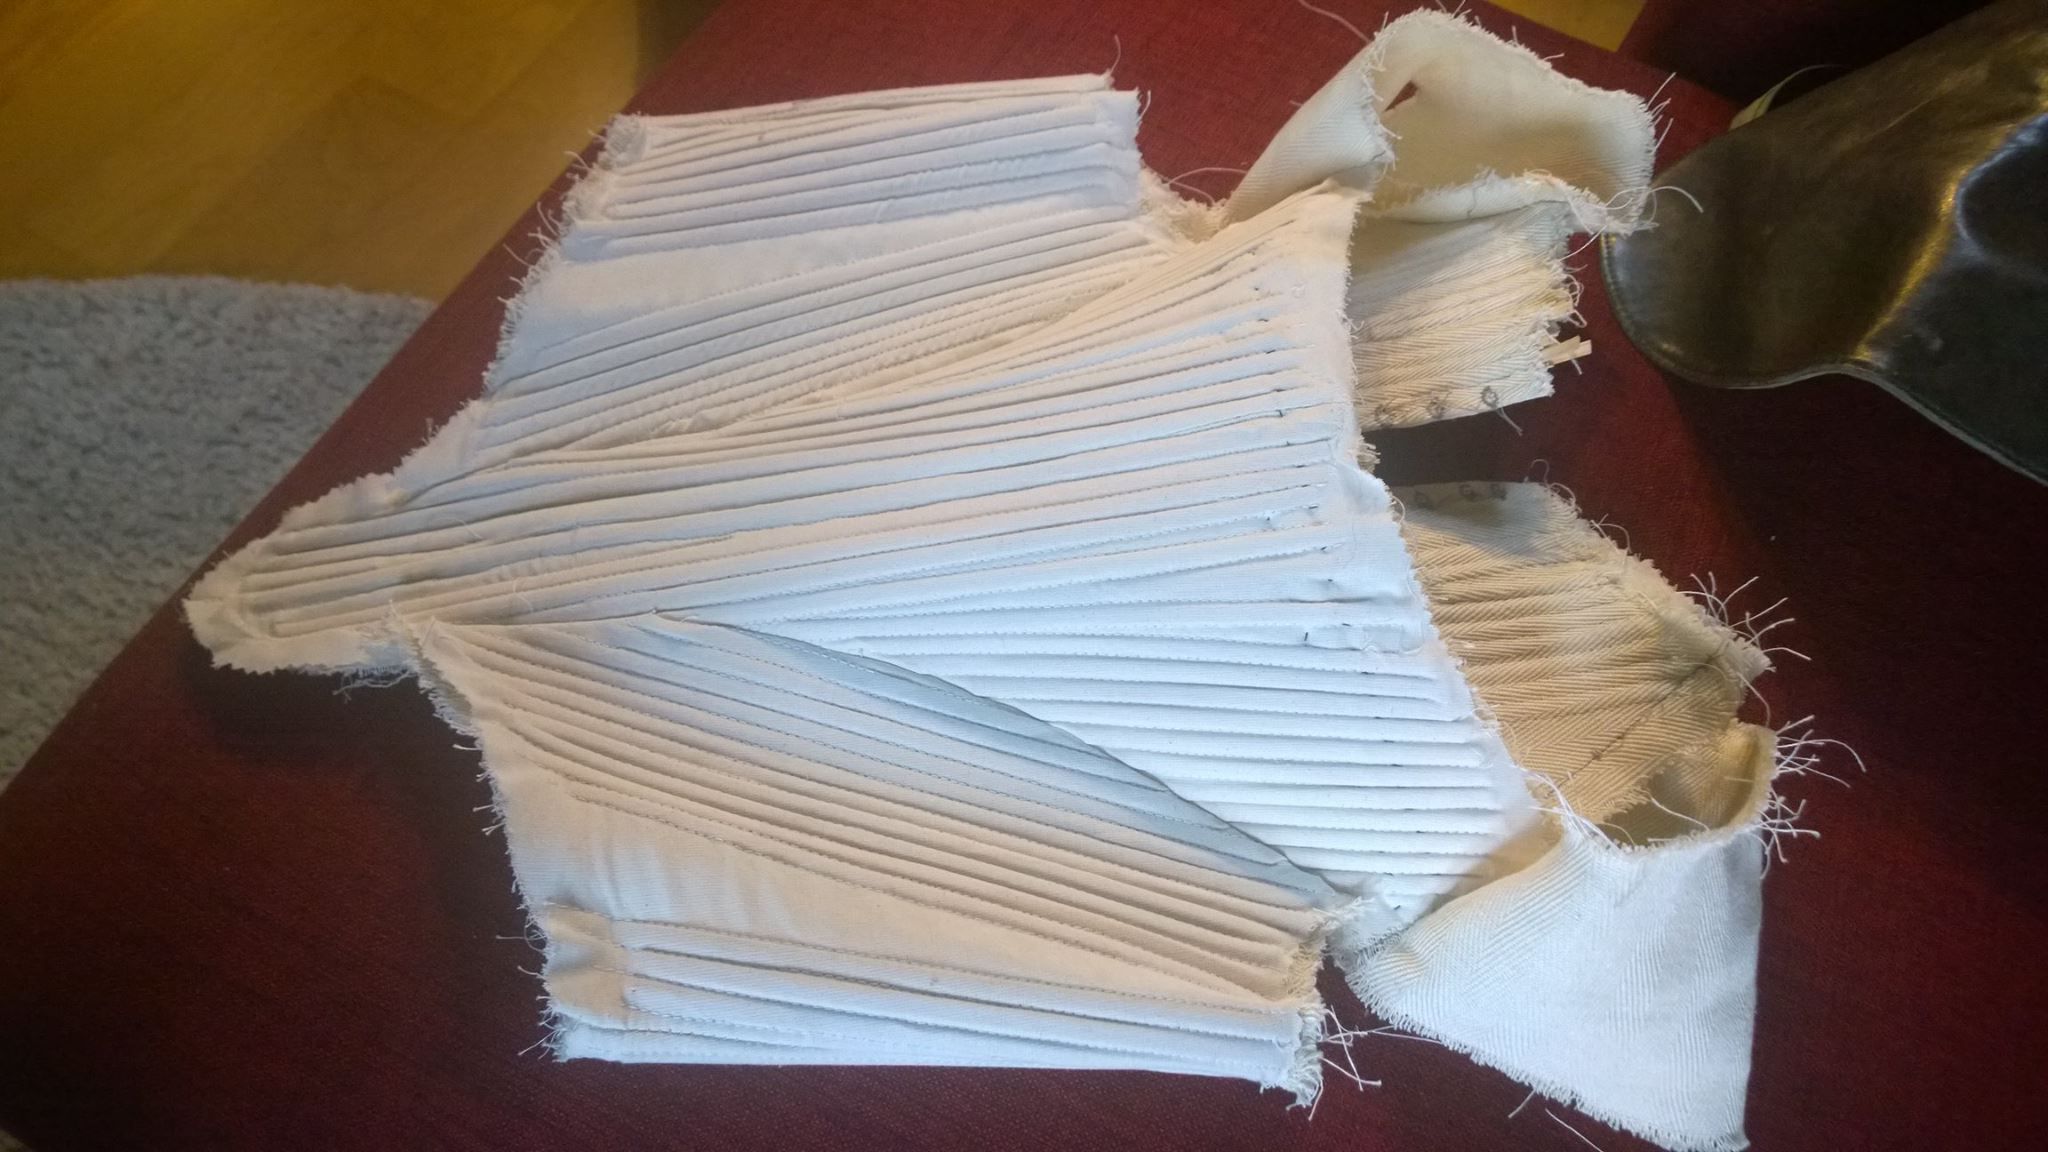
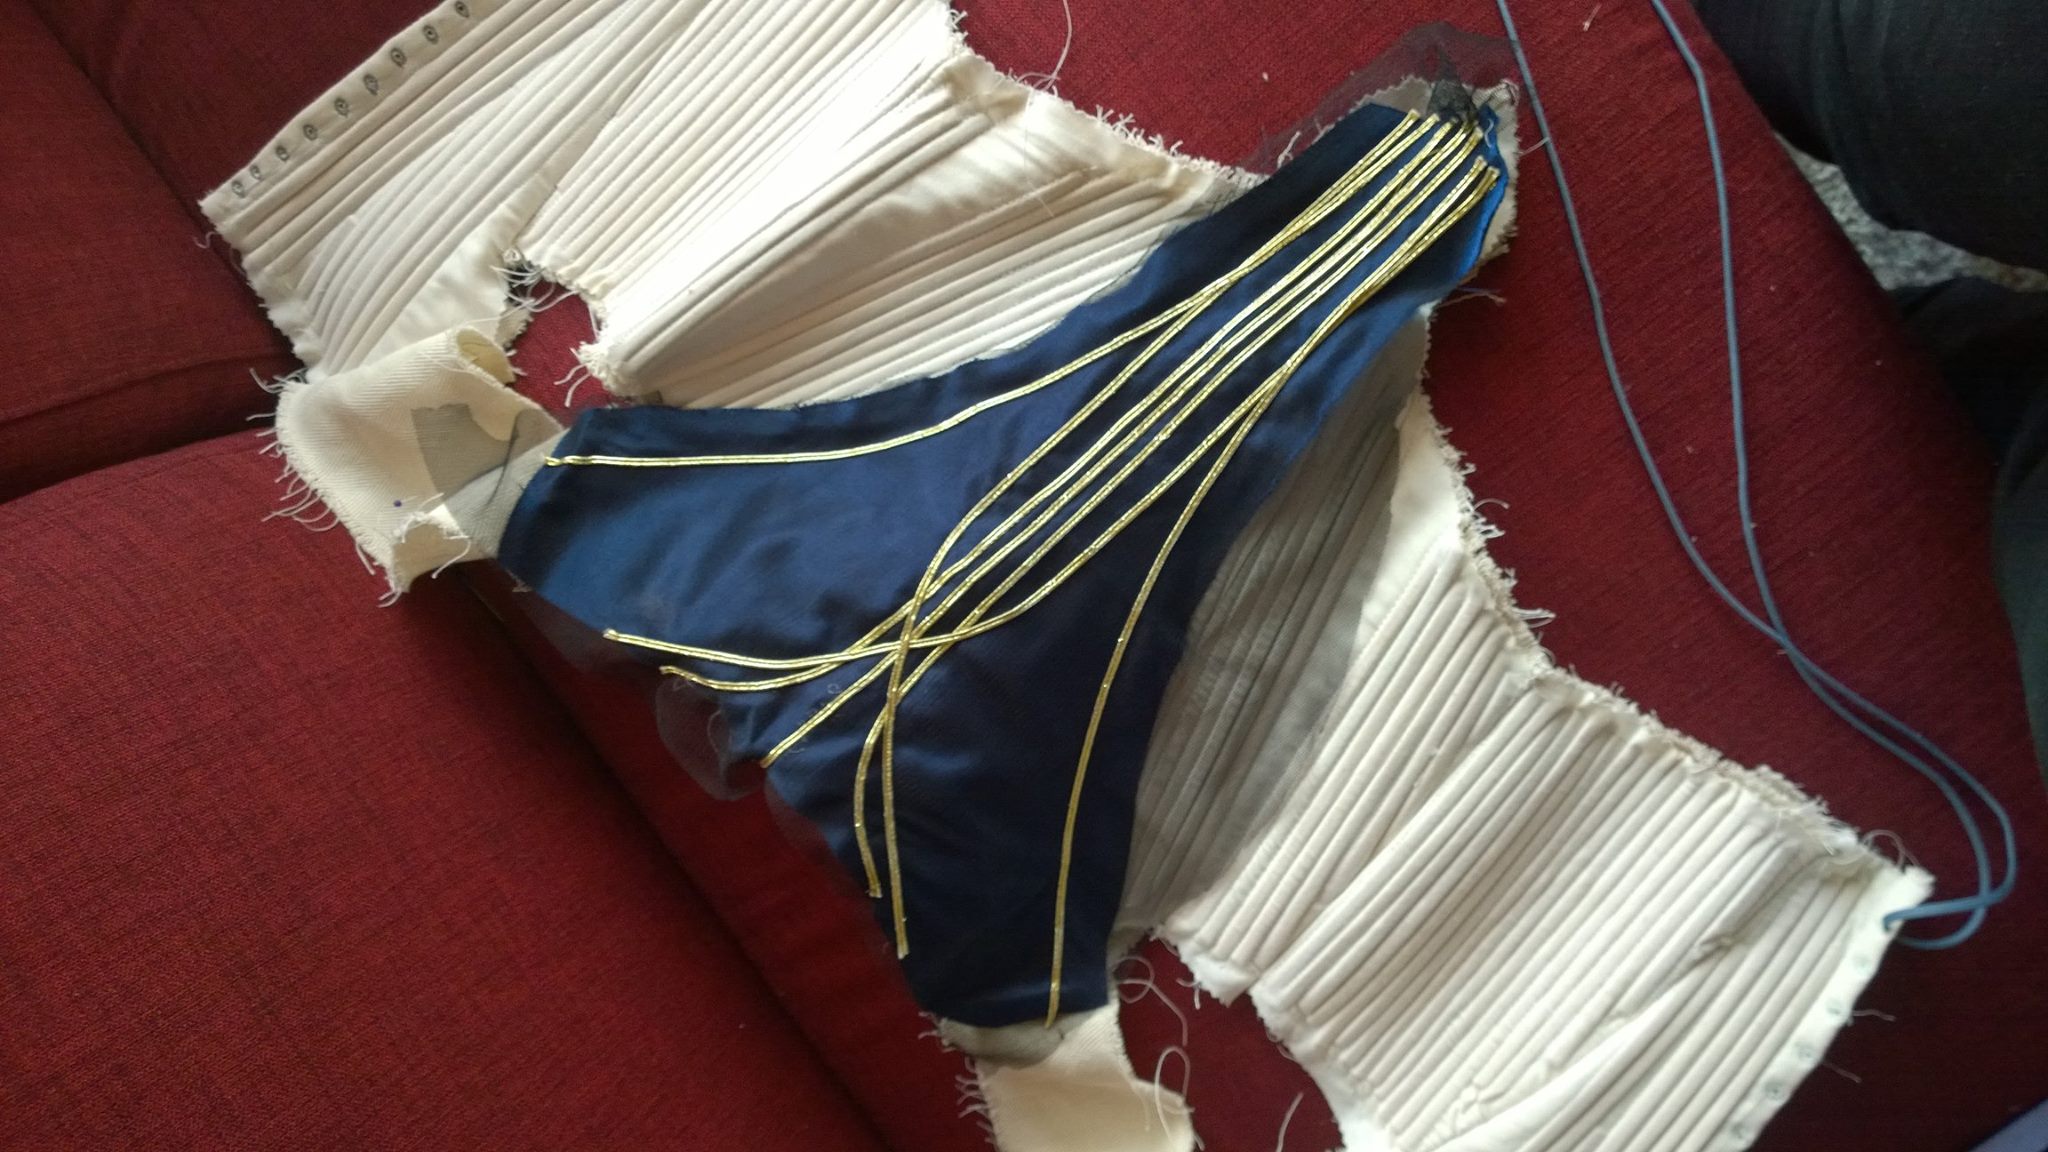
I am talking about stays and corsets, or boned bodices. The better the corset, the better silhouette the final gown will have. Messing up with the corset messes up all the layers you’ll build on top of it.
I have always loved corsets, and even if I don’t waist train, I enjoy a comfortable undergarment that allows me to breathe, but that creates that tiny waist illusion that makes every costume look incredibly better. The waist is a key point to historical costumes, a point of focus, so you want to get it right. You want to get the right silhouette from the side too, which means right bust shaping and support. A modern bra can be spotted by a long distance, and so does the lack of support. You have to remember that a boned bodice can be historically accurate, for example for 17th and 18th century court dresses, but if you’re boning your bodice for a 1860s ballgown or a 1905 walking outfit, you still have to do wear a proper corset underneath, so no excuses, now you know it.
The shape of it.
The ideal corset or pair of stays is never an underbust (there are some exceptions, but to start just don’t get an underbust). Great! An overbust then! Uhmmm… it’s not the ideal shape, but better than an underbust and better than nothing. However the ideal level for stays and corsets is the “midbust”. It means that the undergarment should support your breasts to their widest point, period. Not sweetheart lines (ok, there are some originals, but they’re unusual, and you don’t want the highest parts of the sweetheart line to push and mark your bodice, when wearing it, so go for the midbust to start, until you know what you’re doing), nothing above that line and no ready made cheap corsets. Believe me, I had ten corsets from sites that sell corsets under 150 euros, and as soon as you’ll be able to put your hands above something different, you won’t be able to get back to those. I had sweetheart overbusts that pushed by breasts under my chin, instead of simply supporting it, and bones that pushed my ribs to the point that I got bruises. This is why you want something made to your measures, not simply to your standard corset size. I know that stays and corsets are expensive, I started making my own because I could not afford, as a student, the work of a corsetière, but just get this right, and I promise it will pay off.
ow many corsets and stays do you need? Where does the silhouette change so much that you need a new undergarment?
If you plan to make gowns from the 16th to the 20th century, you need at least two waist shaping undergarents.
I am no expert on the first two centuries included, but I have managed to make a couple of gowns. I am not talking about historically accurate here, I am talking about what looks good, and gets the right shape. Shortcuts.
Even if most of the gowns of the time had padstitching and other similar techniques to stiffen and shape without boning, I like a good boned bodice for these two centuries. Who aims for historical accuracy will aim for softer silhouettes, but I like tiny waists and sharp lines, it’s simply my personal taste, it looks better to my modern eye. So I have something that can be called “a pair of bodies” or something that reminds the earlier types of stays, and I use it under these gowns. I like heavily boned bodices better. So it’s up to you, if you want to build the dress over some boned undergamrnet and struggle to have a perfect fit over it, or bone the bodice. As long as you bone the inner layer, and you don’t get topstitching on the top layer, it doesn’t bother me.
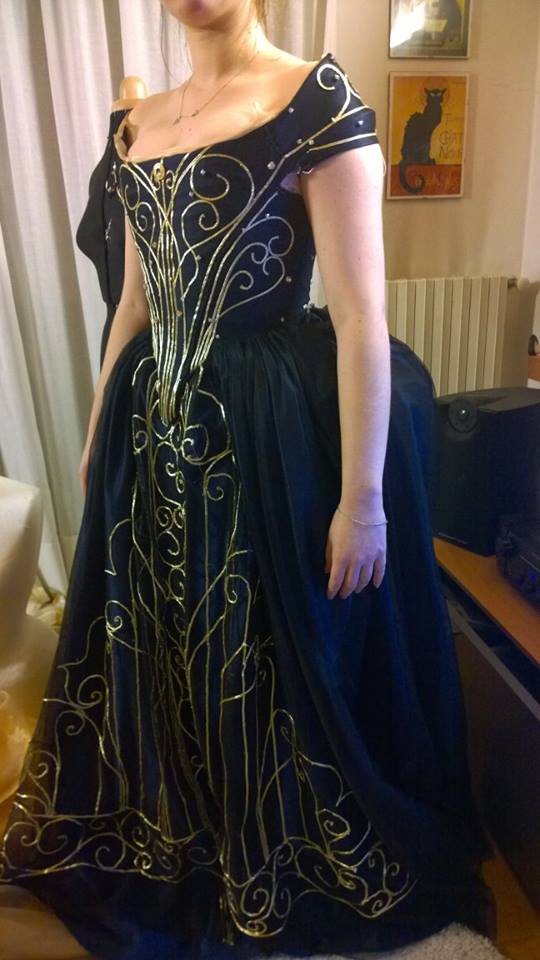
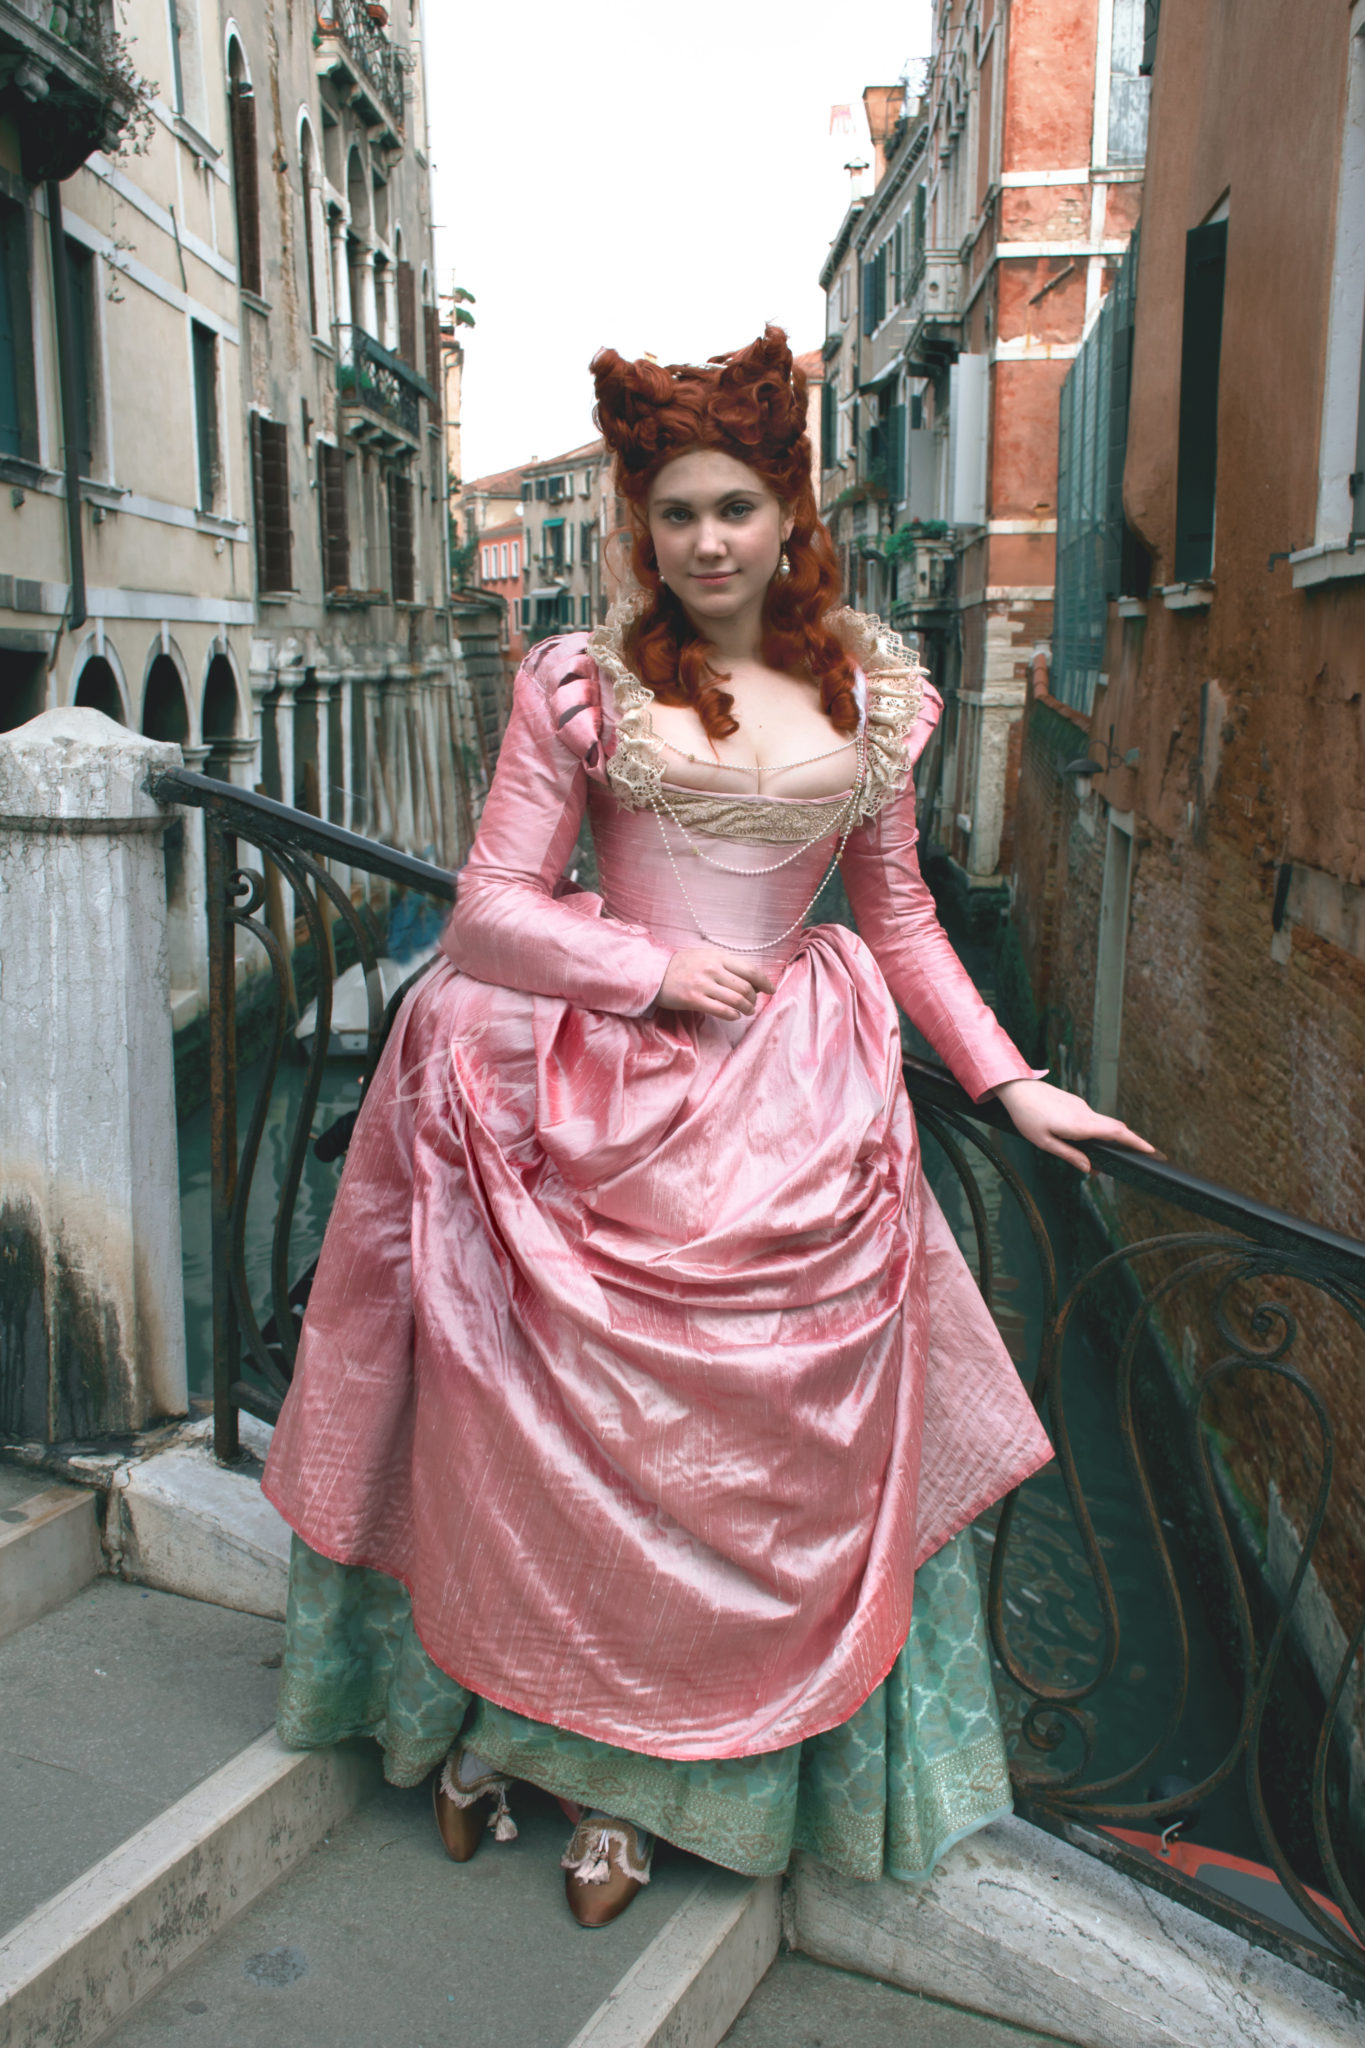
The dress I made, inspired by The Borgias series had the undergarment I made according to some drawings in The Tudor Tailor. The 17th century inspired dress in blue and gold had a boned bodice made after Janet Arnold’s books. The venetian courtesan dress had a boned bodice again inspired by the drawing in The Tudor Tailor, with boning all over, except for the breast part (I don’t like it much that way, I need to pad a bit under the bust to avoid the fabric to fold there and the dress I wear over it to make wrinkles). I am planning a Tudor-looking (again, to look nice to me, not to be accurate) green or silver dress, and I will make it with a boned bodice.
It is important that, if you’re looking for some waist reduction, you get boned tabs at the sides, or you’ll end up like the actress in Poldark who named her pair of stays “Cruella”. Yes, this applies to stays too. If you pull too much, without boned or reinforced tabs, you can get bruises at the waist. A good undergarment should not ever do that. Like ballerina shoes, the right model for you only hurts when you abuse of it.
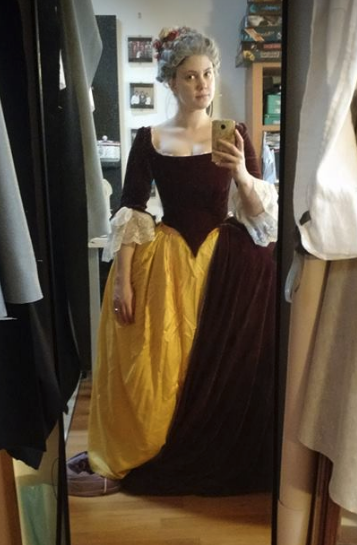
And now to stays. Considering the 18th century, you get a huge number of different shapes. They’re longer at the beginning of the century, and get to the shape of an almost balconette bra in the early 19th century. You can do quite good with one pair of stays inspired by the middle of the century, stretching a bit. If you want to get the best out of each outfit, you’d need a pair of stays for each decade you’re making a dress of, almost, but you’ll get to that over time, if that will interest you. I have two pair of stays, the first one is very sturdy, in linen, boned with double reed, and has a longer shape. It’s the one I’ve worn with my yellow Robe à l’anglaise, my first Robe à la française in light blue and the Vestier dress.
The second one is actually a pair of jumps, more comfortable, angled, light, that I will use for a Robe à la française. They’re so different that, if you switch them, the dress will look ill fitting, which is why you want a good pair of stays, so that you won’t have to reshape all of your historical wardrobe when getting a better pair. The velvet dress is a court gown, so it has once again one of my beloved boned bodices.
In the early 19th century you start with a shape achieved with very short stays, to a cupped look. It happens in a short time, two decades. So if you go for something reminiscent of 18th century, you can use your stays, no one will see the waist part, and for the later one, you can use a corset (if your corset is inspired by the first half of the century, and has a nice curve over the bust). Don’t use a push-up balconette bra. Please. If you’re planning of doing a lot of Regency and such, get yourself a nice short pair of stays or early corset. Being less boned and short, they usually are cheaper than other corsets and stays.
And now to the corset. Here too, time changes everything. You start with corded corsets in the shape of a stovepipe, to get to conical hourglass ones with a prominent belly, to the S bend shape of the early 20th Century. You’d need a different corset for each decade, to be accurate. To start, you can use a commercial overbust that is not too high on your bust, or cut one so that you get a midbust out of it, if the busk length allows it. Then go for something made to measure that is not too similar to the corded corsets, nor to the S bends. It won’t be perfectly right for each decade, but if it gives nice bust support, reduces the waist enough, it will get you what you look for, if you can pad properly. Again, this is not ideal, but if you’re on a budget, and plan to have one corset for many decades, this- in my opinion- is the best compromise.
And for corsets too, get some color. In the mid 19th century they invented new dyes that allowed wildly saturated shades that were very fashionable!
And get the corset or the stays for the character. Not everybody aimed to the wasp waist, working class had always corsets, but they were not so tight at the waist.
Materials, from bone to fabrics, lacing and busks.
“What makes a good corset is that it has steel bones”. You will hear this a lot. This is only partially true. A good corset needs the proper materials and the proper cut. Real corsets were much lighter than commercial corsets available to us.
About boning, avoid rigilene and plastic boning, but also avoid corsets that are too heavily boned with steel and that have spiral boning all over. It’s said to be more comfortable, but was available just at the end of the century.
The point is that the real ones had baleen. It is flexible in one direction only, and that is what flat steel boning does, but spiral boning is flexible on the sides too, which might give your corset some unwanted twists.
The top of the top is synthetic whalebone, which is plastic, but made to behave like baleen. It’s incredibly light and gives enough support, it’s the most comfortable and accurate option ever, to make anything that was made with baleen. You want some.
“The more bones, the heavier the corset is, the better quality and the better shape you’ll get”. This is false. You can have a very light corset, with only a few bones, but made in two layers of stiff coutil, and it can do amazing things for you. It’s important that the fabric doesn’t stretch (so denim is not an option, nor gabardine and such, you want herringbone coutil or corsetry satin to start with) and that it’s cut properly. A tube with a lot of steel bones remains a tube, it’s the cut of the thing to shape your waist.
You want metal grommets or hand sewn eyeholes at the back (stays should not have metal grommets, earlier things should have hand sewn eyelets, but that would be to be accurate…if you’re on a budget and short of time, metal grommets can do, if no one will ever see them… they should never be on sight) and some nice lacing cord, not satin slippery ribbons.
Why custom made is cheaper than cheap corsets?
Why it’s worth it?
I have spent in awful cheap corsets the amount of money that would have allowed me to get a pair of stays and a corset made by experts. I got more or less ten fancy corsets of mediocre quality that I can’t use, because they don’t work right and they were not made for me…which makes them very uncomfortableto wear, compared to made to measure. A good one, instead, can serve you for decades. If you get a good one first, all the gowns you’ll make over it will look so much better that you can’t even imagine.
Now to the lacing pattern.
This is important, as this can make you look a newbie: spiral and cross lacing. Until the 19th century you want spiral lacing, cross lacing only where you see it in the original you’re rmaking a replica of. Later, you want cross lacing with rabbit ears at the waist for your corset, and your outer clothing laced with spiral lacing, in 99% of the cases, unless you’re making a replica of something made otherwise.
Now that we’ve gone through the basics, some optionals.
This is not really optional, but you can skip it, if you’re forced to: the chemise, the thing that goes between your dress, your corset, and your skin. It’s a matter of accuracy and comfort, it won’t be visible from the outside, except for lace edges, sometimes. It helps avoiding bruises from the corset, and from the rubbing of the cord against your skin, and absorbs the sweat, avoiding you washing your corset and your outer layers. Gets everything more practical. So you really might want one. Even a tank top cut to match the neckline of the outer dress can be better than nothing under the corset. And this is for every time you wear a boned bodice or a corset or pair of stays/bodies.
Then in the 19th century there’s the corset cover or chemisette, it’s the reat great nephew of the partlet, it’s something that covers your neckline and avoids sheer gowns to show the corset underneath.
Then there are bust improvers, if you’re going to need some more volume there, but these are for when you’ve gained some experience already.
Oh, this. I have to say this, to make everyone happy, and because you’ll hear it a lot in the future, from everybody: “They don’t make fabrics like that anymore”.
And it’s true, they don’t. But you want a dress, so you have to compromise. Even the best fabric, unless it’s been produced back then, is compromise. Because if you go to the tinyest detail, you’ll always get a difference. Linen is no longer made that thin, but at the same time the plants have been further selected to be more productive, if you get wool, sheeps get chemicals and such to produce more, live longer and such. You have to be aware that there will be compromise, you just want to make it as little as you can.
And the longer distance between us and the time you want to recreate, the greater the difference between available fabrics and techniques to produce them. So, for example, you can find a lot of fabrics that can work for victorian times, but very little already available that can really work for ancient Rome. So everything is compromise.
What really is important: avoid polyester. You want these four magic words: silk, linen, cotton and wool. You’ll learn later when you have to pick only some of these, but to start, it’s ok to use all these four.
Next important thing: don’t use Ikea’s solid color cotton fabric for everything. Nothing wrong with Ikea’s fabric, there are some that are just the perfect printed cotton you want for your 18th century middle class outfit. But if you get too many dresses made of that within the range of a glance, they’ll look all factory made, no matter the amount of trims. So…get your fabric, don’t go for plain solid color cotton. See which colors were popular from fashion plates, originals and paintings, don’t settle for “they loved pastels, period” for the 18th century. And go for prints, brocade, plumetis. Not all in once, everything in its proper time frame. The wrong pattern of brocade can damn a whole costume. And in this case, avoid tablecloth brocade. It can do for some renaissance stuff, but more renfaire than actual renaissance. The wrong flower print can make your nice dress a thing made for a 1950s doll.
Clothing is mainly made of fabric, you can’t make a good dish without the right ingredients. And using the wrong ones makes you look like an american trying to cook pasta.
There’s no secret, you have to look, study, a lot. A LOT.
To start, you can try to get the closest you can to an original example. Fashion plates are nice, paintings too, but they’re open to reinterpretation. Remaking something simple, that is real, allows you to see exactly where you lack. It’s hard, you’ll be open to jodgement of others who know the dress you’re recreating, but it’s the best way to learn.
Try also to understand the right fabric for each occasion: a court dress and a walking one wouldn’t be made of the very same fabrics, so you can’t see a fabric with a specific pattern you’ve seen on a court dress to make your middle class day outfit.
Not only the pattern and the weave, but the hand, the draping qualities. Some tasks require soft fabrics, other thick ones, some flowy ones, others crisp ones. Flatline, if you aren’t happy, nothing is sad as a Polonaise with a floppy back.
And try to mix them! Getting two identical fabrics of different color is not always the best option, if your sewing skills aren’t refined, you’ll end up looking like the cosplay of a cartoon character. Change textures. Opaque, matte, shiny, metallic, velvet, combine and play. Once you get it right, it will make your final result way more realistic.
For the fabric pattern, I can’t avoid repeating this: look at paintings, fashion plates, photos, when available, originals. For colors too. Before the 1860s many bright and saturated dyes weren’t available. The size of the polka dot, the width of the stripe, the type of flower printed or embroidered, if the pattern is printed, painted, embroidered or woven, and how is it woven. The closest the match with original stuff, the better the result. Too big flowers on the brocade can make you look dressed in a tablecloth. A good tablecloth with flowers of the right design can look like a painting once you’ve finished with it.
You’re going to put a lot of work on the fabric you choose. If the body is the canvas, fabric is the paint. Da Vinci once wanted to make a sort of fresco with wax, to be able to handle his very long times. With a fresco you can’t go bak, once the area is dry, it’s done. He tried the encausto technique, and the whole thing melted off the wall, they say. Chosing the wrong medium for your work afflicts the final result, no matter how much you work on it. So put yourself in the condition to take the best result out of the time you’ll spend working. Get the right fabric. If you can’t afford the right one, change projet or wait until you’ve saved enough.
So…long story made short: clothing is made of fabric. If you want a good cake, you need to start from good ingredients.
This is one of the hard parts to get right, and it’s something you can’t do right without research. Very few commercial patterns are accurate as they claim to be.
No matter how good that Simplicity pattern looks, it’s something simplified to ease the beginner. It’s good to start with, but it will somehow always lack something that makes it look real. I’ve seen very few costumes made out of commercial patterns that turned out not costume-ish in a bad way. It needs some extra steps to make them look “wow”.
First of all, most of period clothing wasn’t made to size, but to measure. The concept of “size M” is very modern. Fabric was once expensive, and most women had basic sewing skills. Dresses fitted the wearer and were made for the wearer only. If you get this, you start understanding why a commercial pattern would need a huge amount of adjustments before getting even closer to the look of something made for you, with a pattern designed for you.
I get that if you’ve started not long ago you might not be comfortable in taking the chance of making a ton of horribly fitting garments before learning how to draft yours. But this is what pays off the most.
I have not studied pattern drafting professionally, and that shows to the eye of the expert. But if you are willing to improve, you can achieve good results, and final effects that you haven’t seen dozens of times in different colors already. Something just yours. That’s so nice!
Something that I can’t repeat enough times to highlight how important is, is looking at original pattern books. Go to Pinterest, purchase books on Amazon. Don’t take for granted that they started from your basic modern bodice pattern, because they didn’t! Look at the next two pictures, a victorian and a modern bodice. It’s not just about where the seams are placed, it’s a matter of proportions, it’s all about that tiny curve on the shoulder that in the moder one is just straight on both sides, it’s about this little things that build up historically believable detail.
Period patterns look weird. Always. Sleeves change much from decade to decade, everything does. And once you start getting the differences from century to century, you start getting how a certain cut has evolved from the previous fashion. Also consider that those pattern books were not made to be cut, they were examples of the shape it had, but there always were instructions (talking about victorian times, when they had books on how to make dresses themselves) on how to get the real size pattern on the measurements of the wearer.
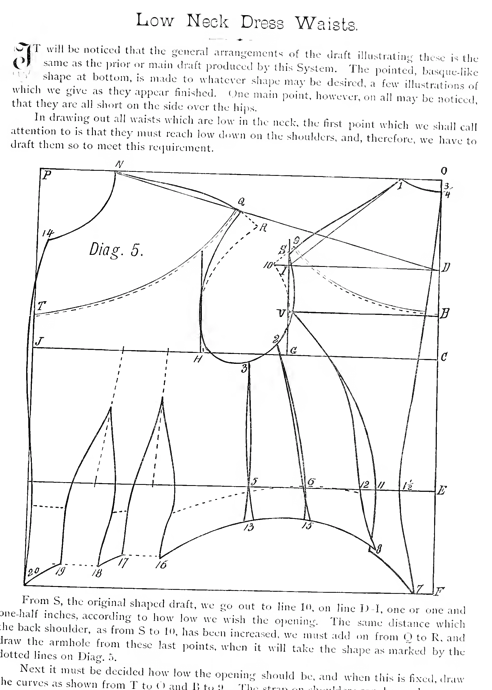
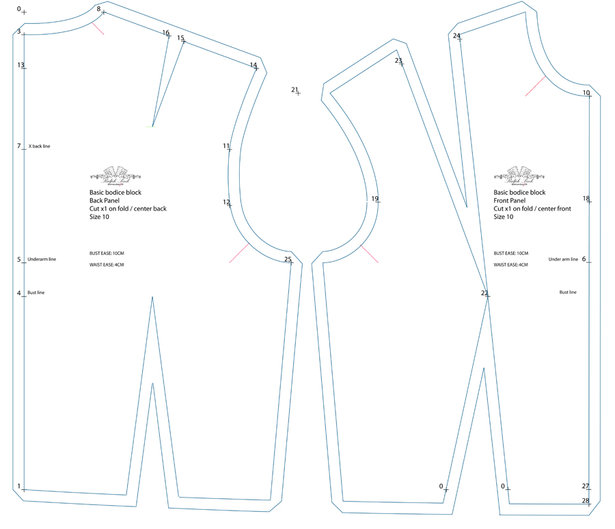
So…what to do if you’ve started not too long ago, and you want something nice? Get someone to draw your pattern, someone that does accurate historical stuff already and knows exactly where to differ from the modern stuff. It might be expensive, but it pays off. I know Nehelenia Patterns did that. There are also many interesting books on how to get historical patterns from modern ones, it’s not the accurate process, but it can help a lot to understand how it works. I can recommend “Creating historical clothes” By Elizabeth Friendship, this book can help you start.
The placement of the seams and the alignment of the pieces can really show up in a second and reveal something made by someone that didn’t do his homework.
Also, bodies were different. You might have seen very small beds and tiny dressing forms from museums and castles. No matter if you scale it to your size, even a Janet Arnold pattern needs adjustment on the person. You have to really understand that a pattern can only work for the mock-up! No way you are going to get a nice dress, if you get a commercial pattern, you select your size, and start cutting the real fabric. Even the best pattern needs adjustment. Because nowadays we are used to the unpleasing bad fit of commercial clothing. At the time they spotted these things right away, and they knew how to avoid these things even when making a middle class gown. The period dress has to fit to your body, has to look like it’s been made for your body only, fit like a glove. Most of them have to fit very tight to the body, while in our days we have inches of room in a T-shirt and stretch fabric. This is very important, to adjust the mockup and the pattern on you. You can skip it, if you have already made a dress from that pattern and have already made a mock-up for it. But even if you make your own pattern according to the book, directly on your measurements, you need the mock-up. I have often lacked the patience to make one, and it showed up every single time, if compared to garments I have made one.
Pattern → mock-up → fitting → possible second mock-up if too many changes are needed → real fabric.
This has to be like a prayer, like something you keep in your mind, you historical dress making gospel, if you want to improve.
One of the things that are appealing to the eye, when we’re talking about costumes, is the contrast between straight and round lines. Those tiny waists looking caged in a cone shaped bodice, and a draping, soft huge sleeve like a cloud, or a huge skirt.
Assuming you already have done all that’s listed above, it’s now time to start cutting and sewing. Hopefully, you’re reading this before starting to plan your budget, and you can still add some less fancy fabric.
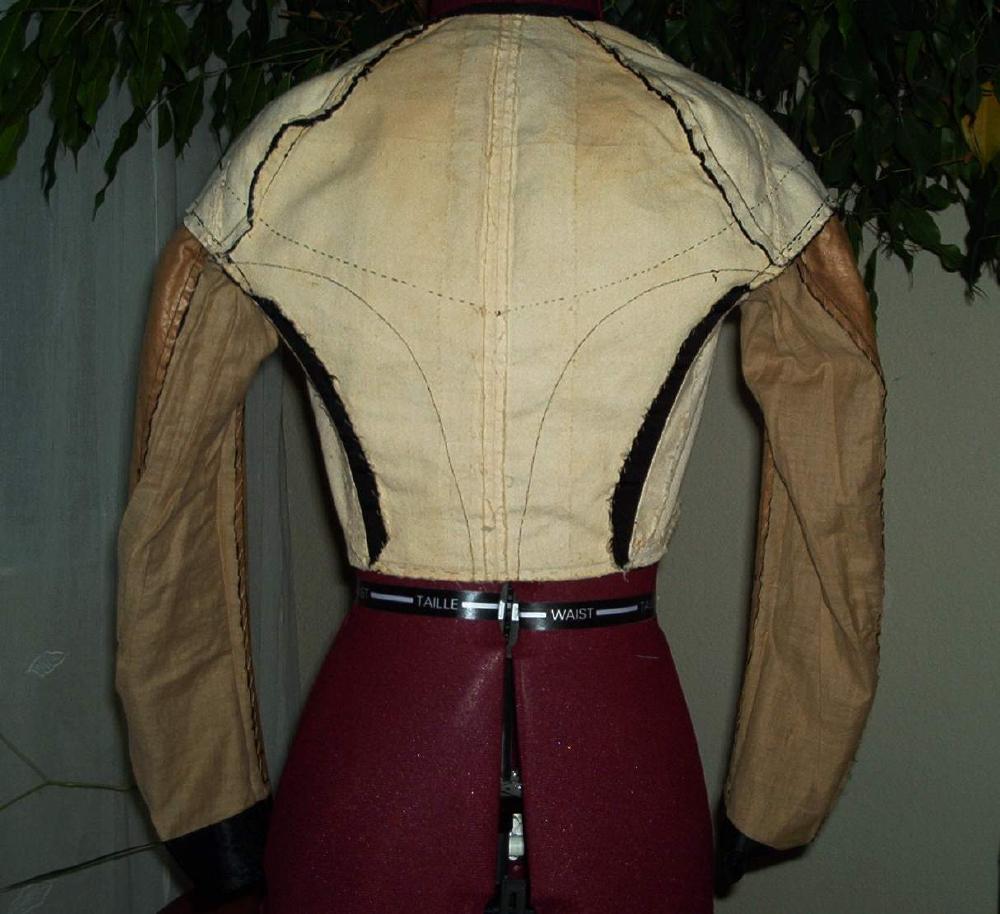
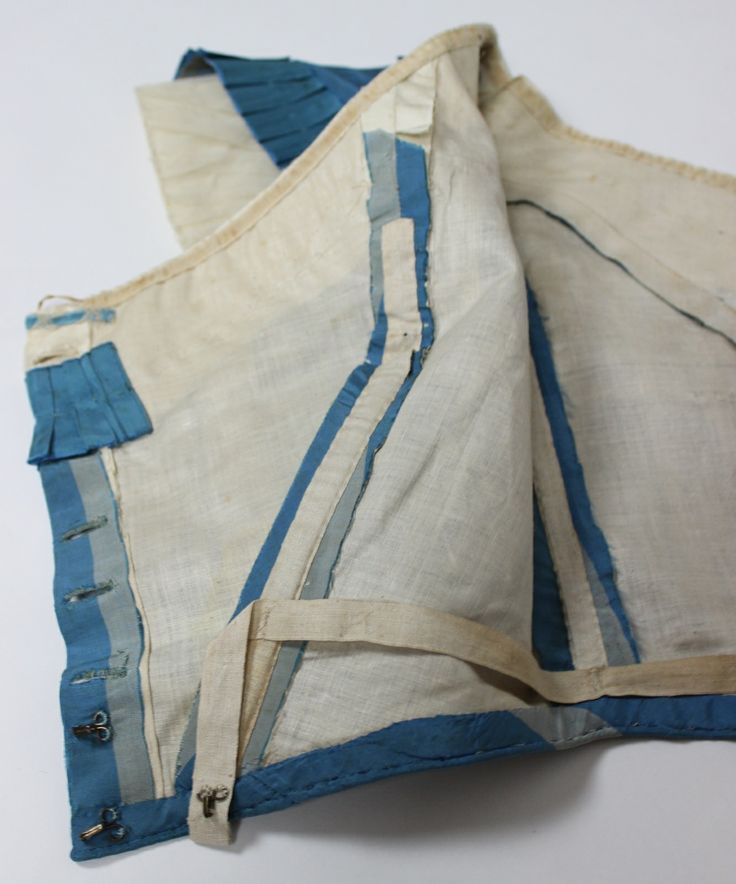
This is a huge trick to make good looking stuff: you usually need more fabric, different fabric to the outer one. You need to reinforce, flatline, line. This is something that couture designers have always played with, from Charles Worth to Charles James. If you see a nice stiff and flat bodice in silk satin, its stiff quality is probably not only given by the undergarments or its own boning, but also by a second or even a third and fourth fabric on the inside. Boning a bodice or a jacket to go over a corset was not uncommon for 18th and 19th centuries, the corset doesn’t allow you to avoid calling reinforcements. And remember that if you’re boning, you need a solid base to attach bones to. Attaching boning channel to a very thin satin bodice isn’t going to make the thing good on its own.
The first trick is flatlining. This means that you get the fabric you want for the outside, according to how it looks, but you make a second layer of a fabric that behaves like you want the first one to do. Linens and cottons are popular for this task, but especially in the 20th century a lot of new combinations were discovered. From flatlining something floppy with silk organza to get it full and light, to adding cotton flannel between the strength layer and the outer satin to avoid the bones to show, as Charles James did. And he was a master of that. He used to quilt together lots of different fabrics, when one with the features he wanted was not available.
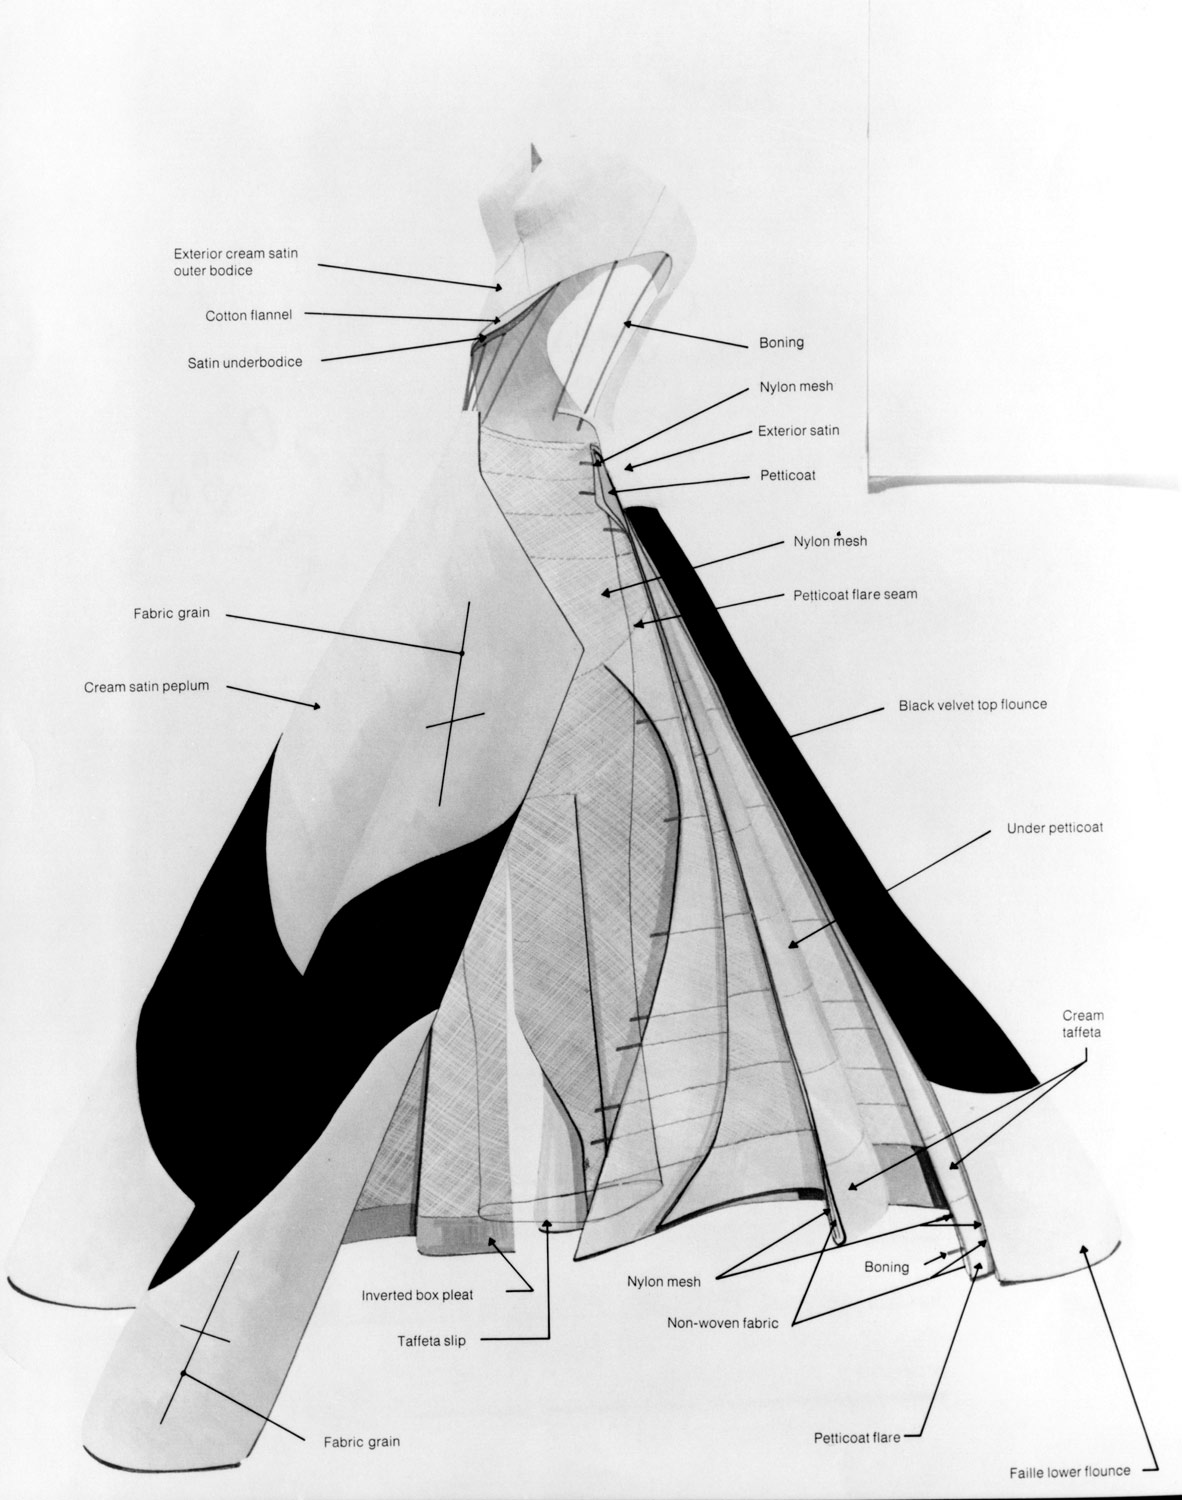
James’s work is not period clothing, but horsehair on hems is. This is what we’re talking about, giving strength to some key point to obtain clean lines and a nice silhouette. And sometimes I prefer to get less accurate in the essence, than to use accurate and more expensive materials. I use modern tricks to make things look more like period garments used to be. This article is after all about how to make your historical costumes look good, not about how to make them 100% accurate. There are many more expert than I am on that, while on the matter of “looking good from the outside” I probably can say a few things. Of course, if you can get to a result in the accurate way, it’s better, but sometimes you need a little help to fix mistakes, especially when you don’t have years of experience. And even when you have them, especially if you don’t have the luxury of enough time to start all over again. As long as you know it’s cheating, and that is for a good cause, it’s not that bad.
So, basically, with flatlining you cut the two fabrics together, baste them together, if needed, and after that you use the two layers as one single panel. If you wanna be fancy, and do more than what’s visible from the outside, you can also add a third layer for lining, but keep in mind that this was not always used in every age, and that lining was not done as we do today, in many cases you had seam allowances visible on the inside, whipstitched, and that was considered finished and nice looking.
There’s also the matter of roll pinning, if you’re interested in how to deal with many layers of fabric, you can find lots of hepful articles on that.
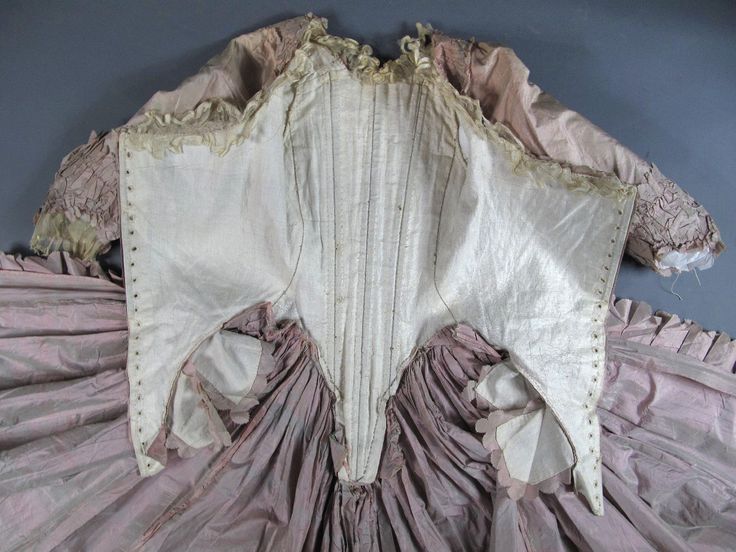
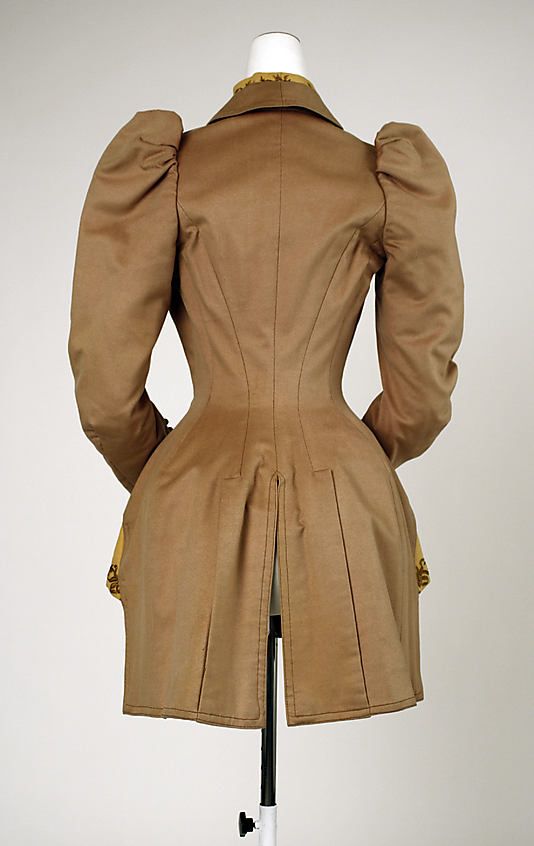
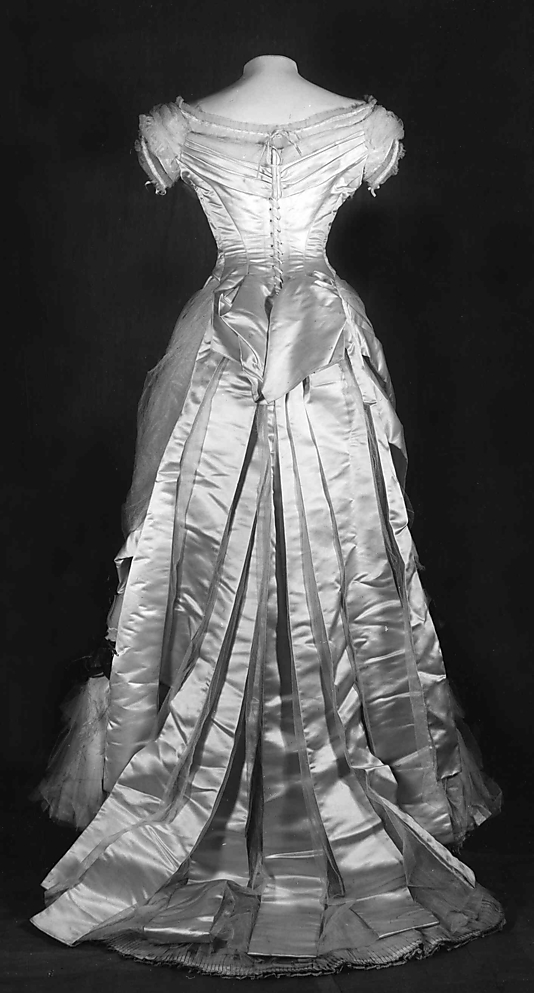
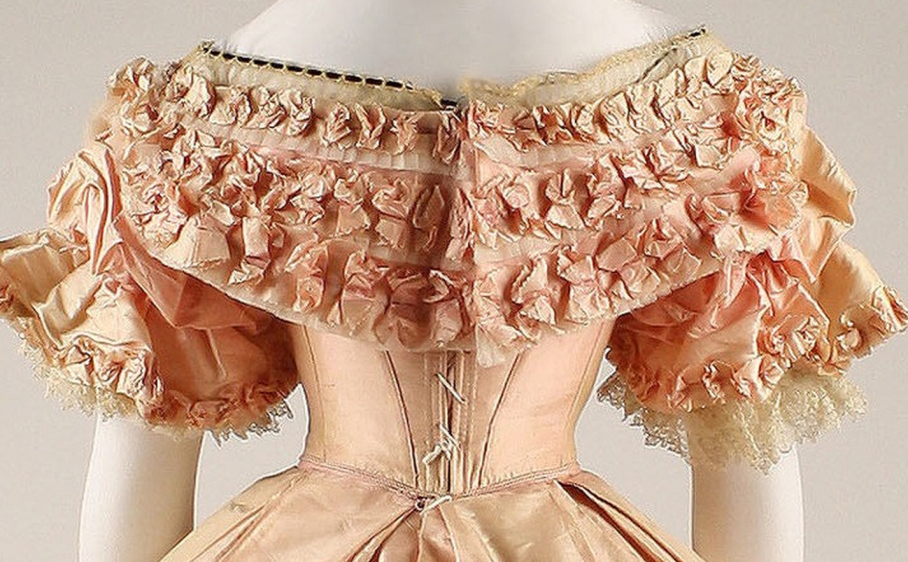
Once again with the mantra: look at originals, look for pictures of their insides. Go on Ebay, and try to find those damaged garments with pictures of the holes and rips, as there you can see what the inner layer looks like, what fabric it has been made of. Purchase them to study, if you can, but pictures on their own will help a lot, save them for future reference and needs, and keep a follder of that in your digital references archive.
Here you can see the inside of some bodices and dresses from 18th and 19th century. You see thatthe bodice itself is flatlined with a different fabric. In one the sleeves have a third fabric on the inside, to have different features on the outside, and on the comfort. In the 18th century gown you see the skirt is left plain. This is what I was talking about, when I wrote about contrast. Use the fabric you need, to get the result on a fabric that’s not how you like it.
Try to avoid iron-on. I know some say that to get nowadays silk satin to look as thick as the period one you need something extra, but iron-on always makes fabric behave less like fabric and more like plastic. Get used to flatlining, and you’ll love it, I promise.
We have partially covered this with the “do your mock-up!” part in the pattern section. However, there’s a bit more. One of the main mistakes is to look for a modern standard fit on period clothing. Adding ease where it’s not supposed to be, making sleave heads as modern ones for 18th century clothing and such things. Part of this has been in the pattern section, but remember to adjust and judge the fitting according to what you see from originals on museum mannequins, photographs and paintings. Look where the shoulder seam is, how the elbow is shaped, how much ease there’s at the wrist, how many centimeters are between the skirt hem and floor in a specific type of dress, how tight the bodice is when closed, how a high neck looks on the wearer, where the fabric twists. All these tiny things make a bit of difference.
I personally find that the most significant difference is made by the smaller back, and by the sleeve seam placed much higher than in modern clothing.
An other thing to keep in mind is to avoid by any means visible machine stitching. Topstitching and such should always be avoided, as machine made hems. This is easily something that could make a very well made costume look like a fancy dress. This is where historical costumes need more time, and that’s not something you can skip.
Yes, I know, sewing machine were invented at the end of the 18th century (did you know that Peugeot used to produce them, before making cars?), but they were a bit frowned upon. They took time to get into people’s homes, and we have to keep in mind that a sewing machine didn’t bring with itself modern techniques. They adapted hand sewing techniques, which means that even if they had a sewing machine, you can’t make a topstitched rolled hem.
And also avoid visible grommets. Grommets were intended for corsets, always to be concealed, and not sooner than 1840s. Grommets in sight and cross lacing are just as bad as a zipper. If visible, it’s usually spiral lacing on hand sewn eyelets, and it’s something that in the 1th century was used for court gowns, in the 19th for evening gowns. Not your usual day dress.
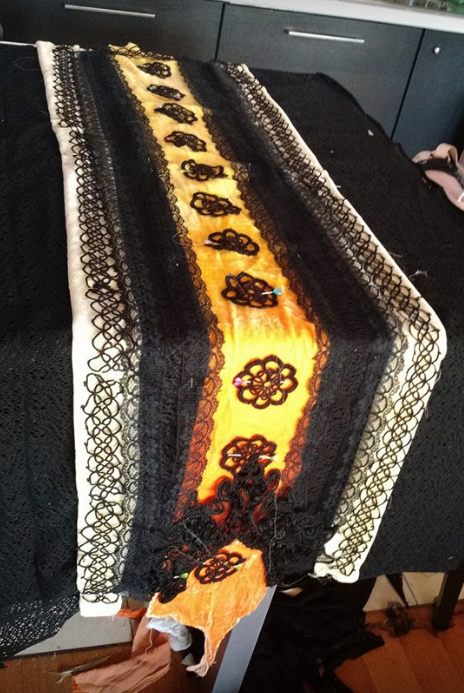
When it comes to embellishment, everything sums up at “look at the originals”, as always. In this, it’s very important to avoid looking at movie costumes. If you have looked at the best of them for shape and constructions, here you want to avoid taking them as example, as embellishment is where the costume designer usually plays most to portray a character, rather than being faithful to the historical look.
Embellishment is important. When you know a bit of history of fashion, a closeup picture on a detail can already reveal the decade the dress was made in.
I usually suggest to start from something, to try to copy it. Then, when you achieved a good result copying originals, you probably have developed some of the right taste for how they embellished in those times. But I get you sometimes want to improvise and get something yours.
So here is a simple list of rules that should allow you not to mess things up too much:
– have you seen that technique on originals from the same decade?
– take colours and colour matches that you’ve seen used in originals from the same decade;
– try to find the same material, avoid synthetics, get viscose if you can’t afford or find silk;
– was the dress used for the same purpose and social class? If there were spangles in a 18th century noble’s dress, if you’re portraying the maid you’re probably not allowed to use them. At the same time a travel dress and an evening or reception one from the same high class lady in late victorian times wouldn’t have had the same type of embellishment;
– look very carefully at the placement and proportions. If something was used at the hem of a skirt, it’s not always good to embellish the bodice in the same way at all times;
– don’t improvise with the pattern, copy from originals.
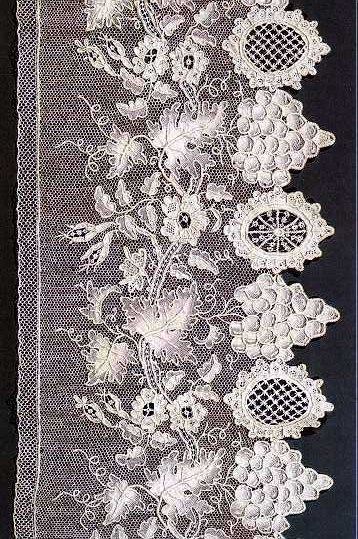
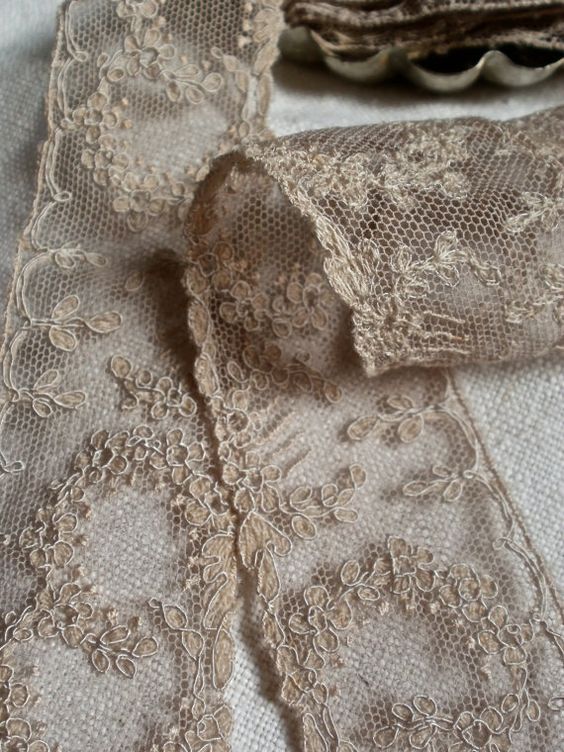
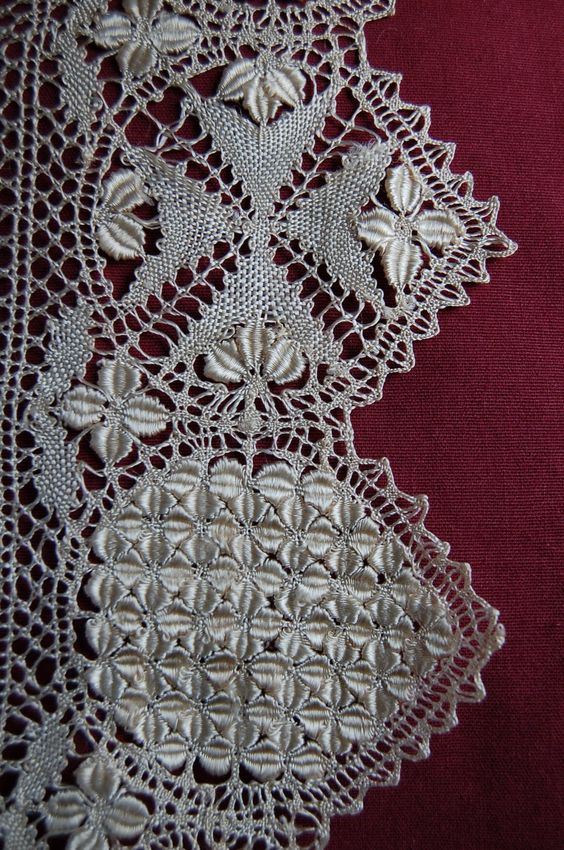
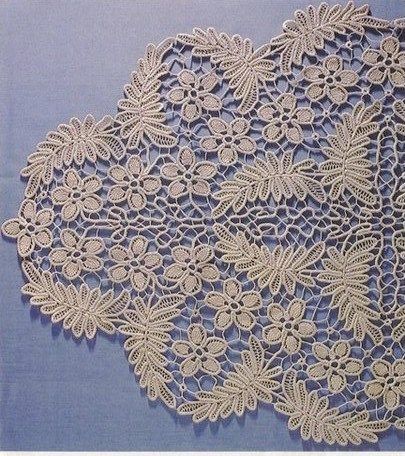
I have to make a special paragraph for lace.
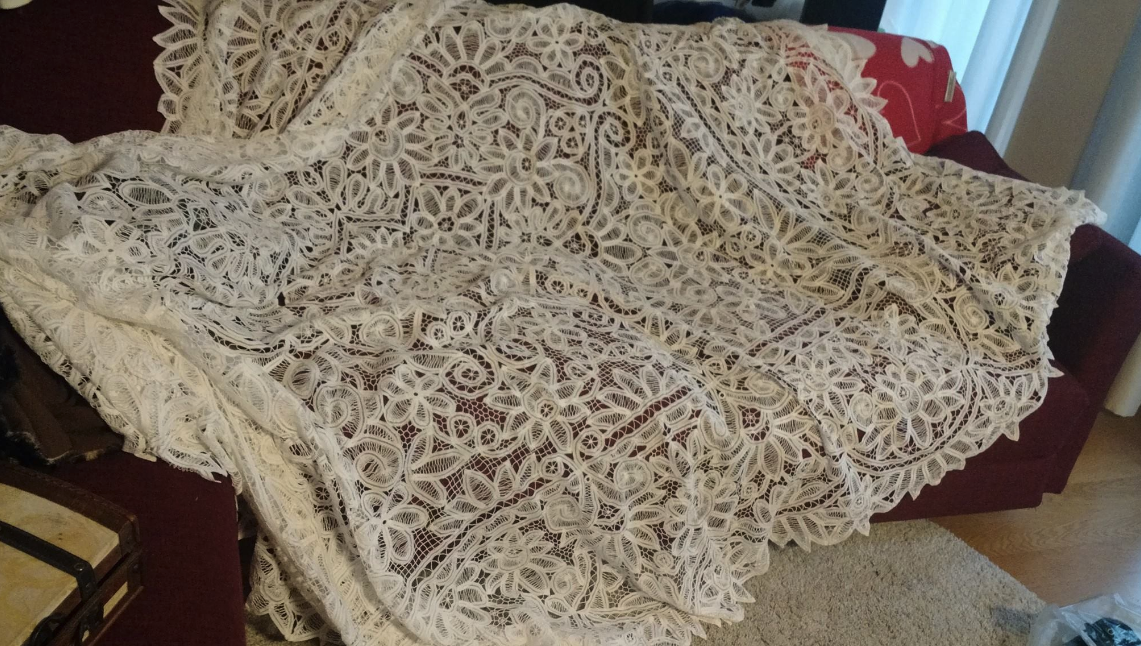
Lace was extremely expensive. It litterally took lives to make. It was not unusual that noble women, when getting married, received “lace sets” as part of their dowry, and some of those lace sets could easily cover the cost of buildings.
Nowadays lace is 99,9% machine made. There are two main types of lace, and I am giving you a very basic efinition:
-lace made with thread knotting and braiding to itself or same threads (tape lace, macramé, tatted lace…),
-lace of thread creating designs on tulle (and other fabrics, such as broderie anglaise and such).
Try to respect these two wide folders. If the original has tulle lace, don’t switch with the other type.
Also pay attention to the material. If it was silk lace, you probably want to avoid visible synthetic lace and thick cotton ones.
Try to get a similar pattern, floral or geometrical.
In past centuries every lace had its own pattern. Some types of lace are just the same technique, they differ in the final pattern only, and in some net laces the embroidery done on them created such a distinctive design that a different lace wouldn’t get you to something that looks like the same dress.
What’s the final point of this whole long paragraph? Avoid lace if you’re not very punctilious. Avoid lace if you can’t afford quality ones. Don’t throw lace on things just because you think it gets the period look. The wrong lace, that looks too modern, dooms the whole work. Try to get some confidence on the look of that decade, before throwing lace on stuff, if you want to avoid wasting good lace on the wrong project.
Talking about accessories, there’s one thing I have to say, and that should be taken very seriously:
If you don’t have a roof over your head, wear a damn hat!
This should be gospel truth. As important as the corset, as important as the petticoat, as important as boning your dress.
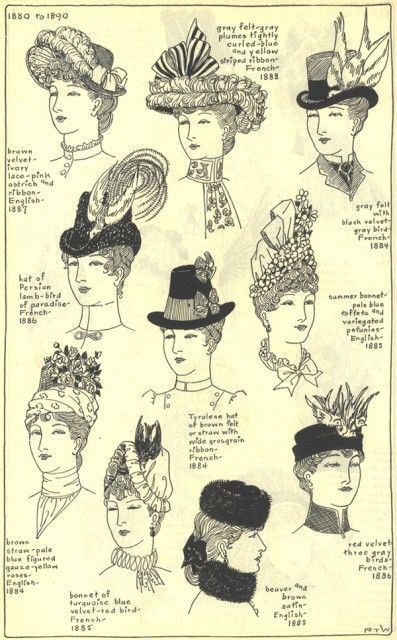
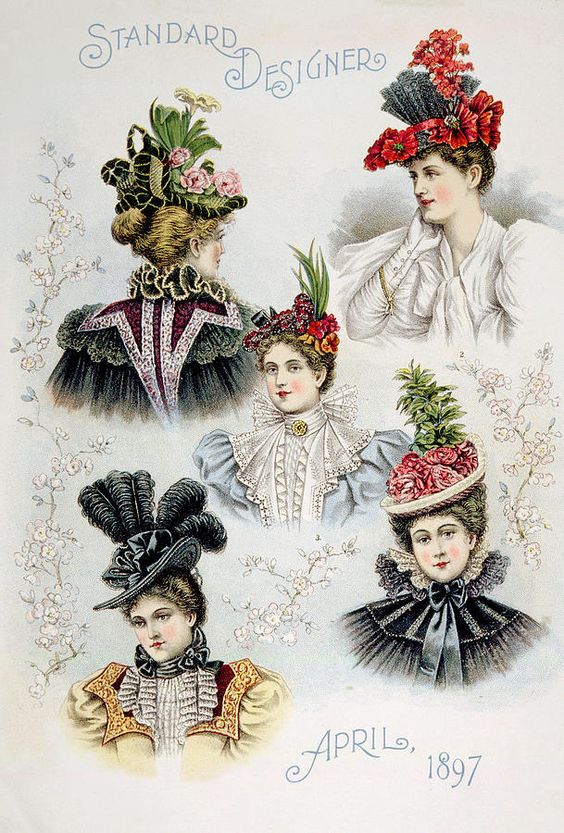
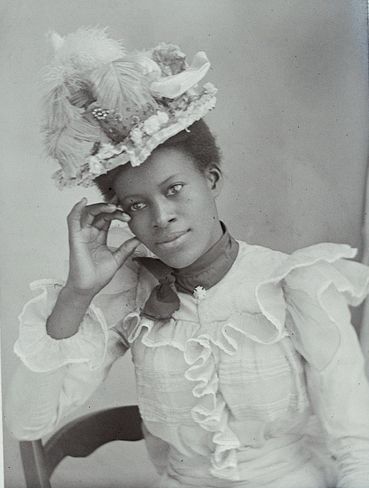
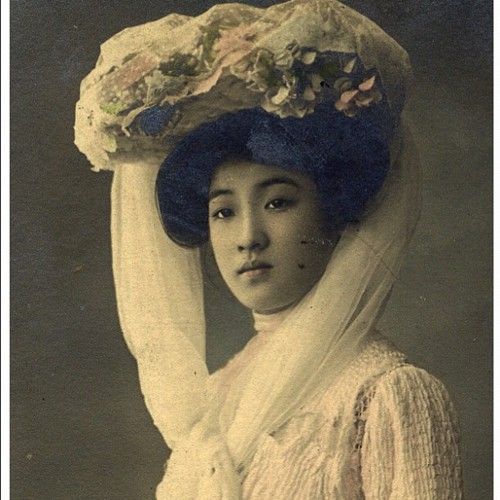
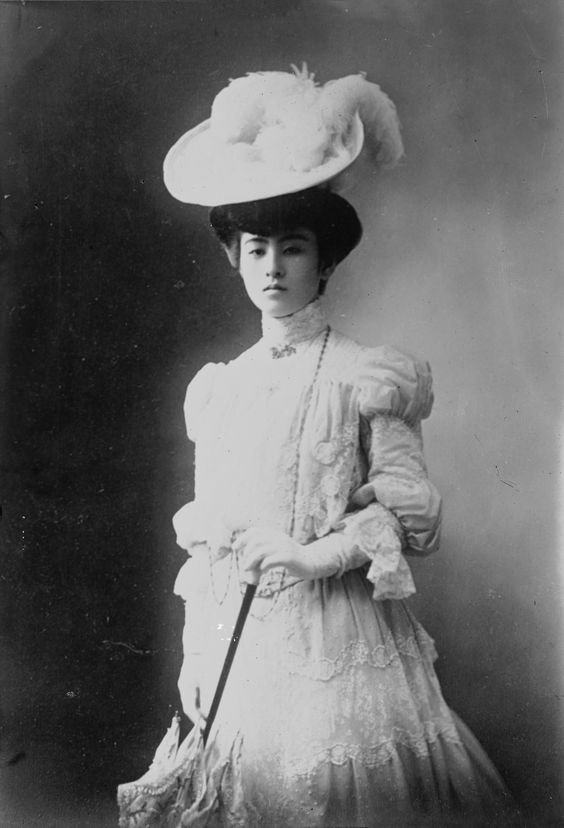
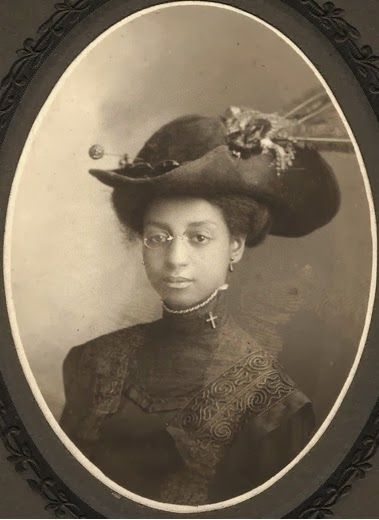
Nowadays hats are worn by eccentrics only, at the time they were just something expected. There are early videos and photographs where everyone is wearing a hat. So wear one, if you want to look right. The right one, if you want to look perfect.
The decade of your hat has to match your clothing. Hats where simply the top of every outfit, they were the cherry on top of the cake, the apex of the concept of the whole ensemble, the wildest part of the whole thing, ladies have always been feverish about getting the bonnet of bonnets. They changed in shape faster and in more dramatic ways than clothing did. You still have to be careful about originals and fashion plates, but if you want a great dress, it has to have an even greater hat.
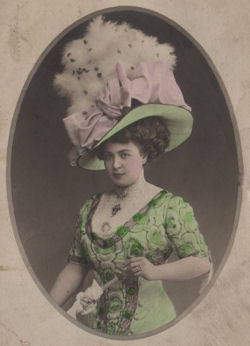
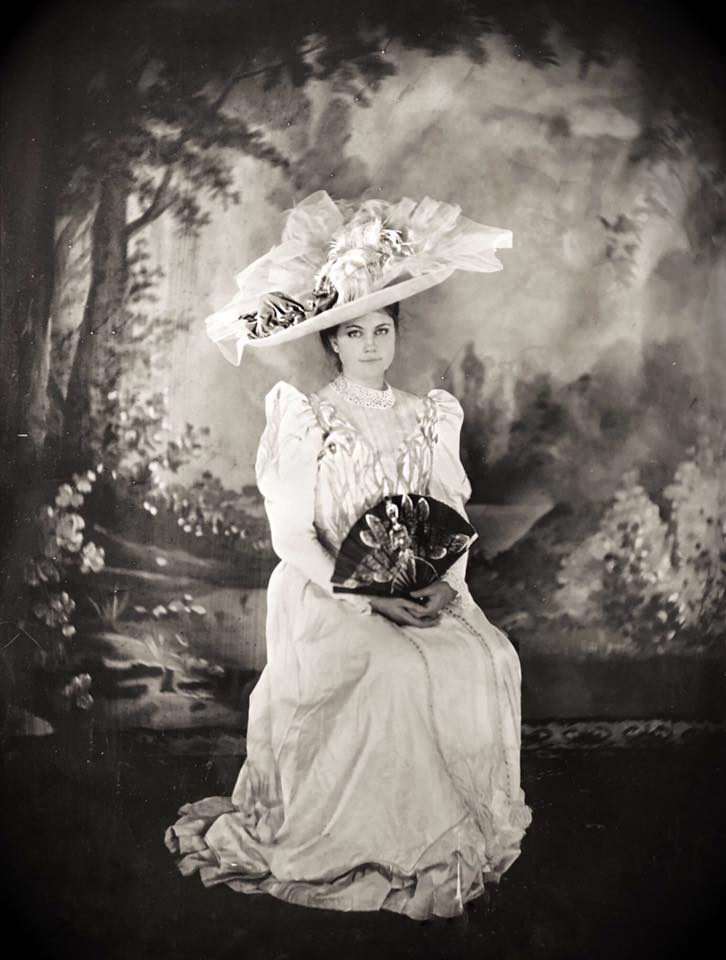
It took me some time. Especially when talking about late victorian and edwardian stuff. I have worn straw hats with winter clothing, and a 1910s type of hat with a 1900s dress. These are things that should be considered wrong. They didn’t work right with the costumes. The straw hat looked out of place, and the too wide hat just cut the line of the dress, the vertical idea of it. Learn from my mistakes. Straw hats are for the warm season. Very wide hats are for the late 18th Century and the 1910s. The 1900s have smaller hats.
Here you can see three hats that could have matched the dress better. the first two ones are a bit too big for the 1900s, they’re more like 1910. The last one is straw for winter.
And don’t always wear your hat tilted. They werew tilted in certain cases, and they were especially made to be worn tilted. You can’t just get a beach straw hat with the high cap we have nowadays, and wear it tilted on your hat, glue two fake flowers and two feathers on it and think you’re good to go. If you want a period looking hat, the cap has to be lowered. I see a lot of people wearing hats down to their eyes. It should not be like this. Big hats have always been paired with big hair, pay attention to this. The brim of the hat never concealed the whole forehead of the wearer, never leaned over an eye. Nor the hair did. Not until the 1910s-20s at least. And from that date I can’t answer, because I don’t know very well what follows 1910.
And have your hat made by someone who does that. I am a fabriholic. And a wigaholic, and there I spend all my extra money. But there’s nothing better than having a wig and a hat made by someone who does great stuff. It’s the perfect birthday treat, something that allows you to leave a mark when you pass. Good hats are expensive, as good wigs. But if you’re considering making more clothing from the same decade, consider this. Same thing for shoes, even if they’re less visible than a good hat, most times. If you’re starting, a Louis heel shoe can get you a long way. Avoid zipper granny boots at all times.
Before getting to hair and wigs, something more about accessories.
Long story made short: get them. Use them. Plently and wisely. There’s a world of fans. Evening fans, day fans, home fans, outside fans.
Also, there’s a place for cameos. Specific times and kind of jewelry. Don’t always use them for everything, especially if you have the cheap plastic ones. There’s a world of quite inexpensive antique jewelry on etsy that can make you unique, don’t waste your time on the average thing everyone can get. Accessories make you stand out, make you look complete, real. Don’t pin that antique brooch to the neck of every dress from 1880s to 1920. Look how they were used.
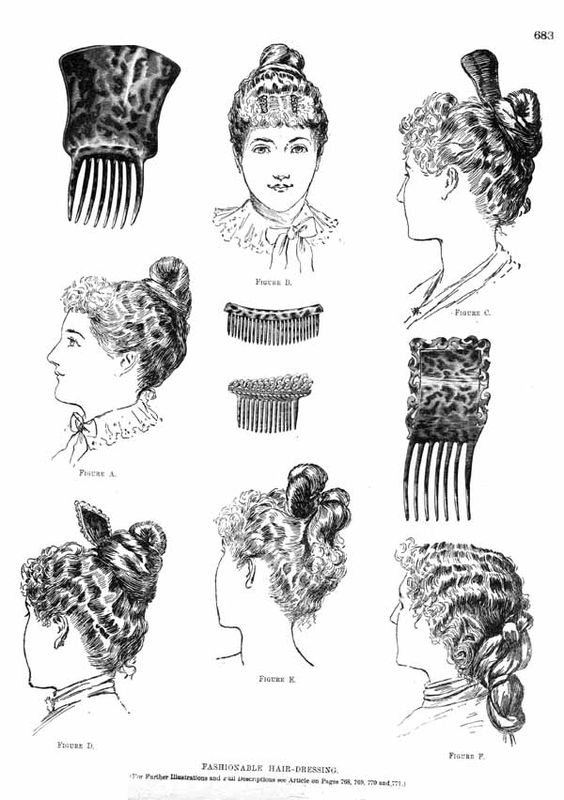
You can get hair combs, gloves, belt buckes, shoe buckles, inexpensive jewelry, antique purses, fans. Play with originals and well made replicas to take your work to an other level.
I will say this out loud: I love wigs. I have short hair, and a very hard to match cold toffee brown colour. Extensions look weird on me. My hair is very thin. You know the hair of a four years old, so thin and soft and straight and silky? That’s my hair. It takes forever to curl, and doesn’t keep volume. Using rats and padding on my hair is pointless, as my hair doesn’t cover it well. I’d need someone to help me with the back, as I can’t see where rats show.
Wigs allow me to have intricate hairstyles without the luxury of a maid, or the need of spending many hours a week to care for them. And they allow me to work the back of the head with confidence.
I mainly use front lace wigs. Sometimes I use hard front ones and comb the front part of my own hair on top. I have a very low forehead, so I usually need to alter the hairline, to add more hair to a wig, before I can use it, and when I use a ready to wear one, they don’t remain glued down very well on me. But if you have a medium to high forehead they will be very simple to use, and you’ll be able to enjoy changing colour every time you want, to get the best match with the outfit.
I use kenakelon wigs. High quality synthetics. Real hair is expensive, and while heat sets synthetics, natural hair is sensitive to water. So sweat and rain don’t help much.
You don’t have to wear wigs. You can style your hair and use extensions, rats and such, if you like. I just find more comfortable to do the wig the day before, sleep well without rollers or the fear of ruining my papillons, and get the head done in the five minutes needed to glue the wig down.
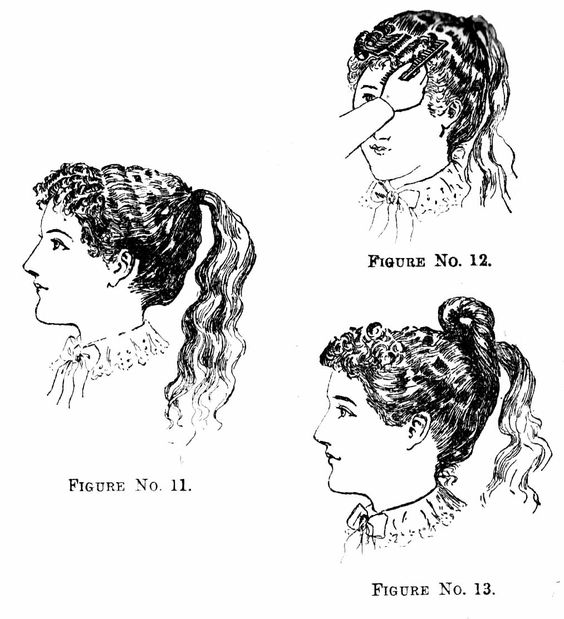
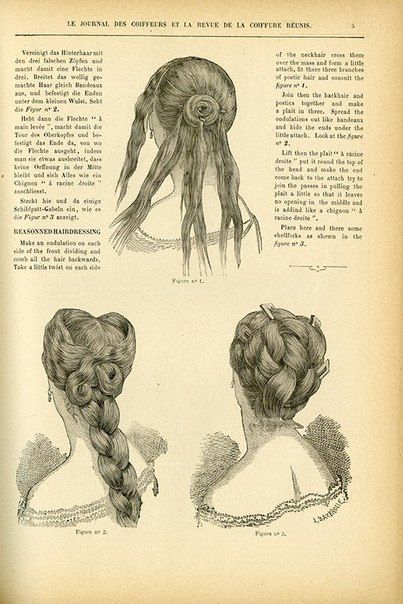
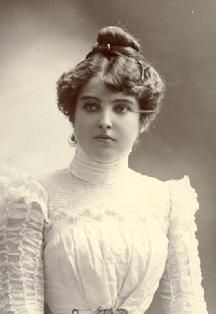
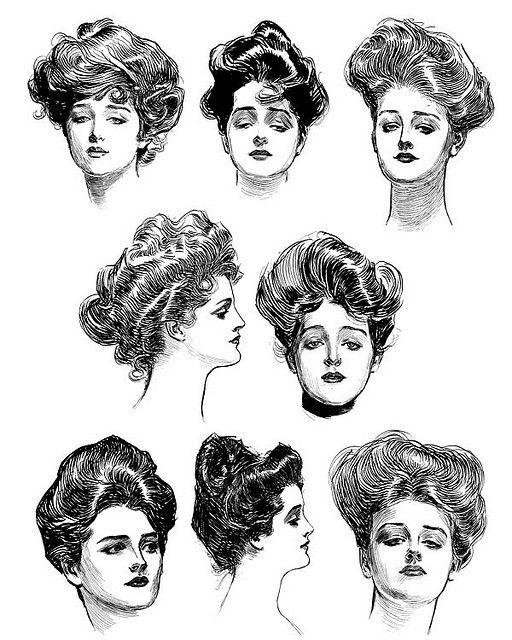
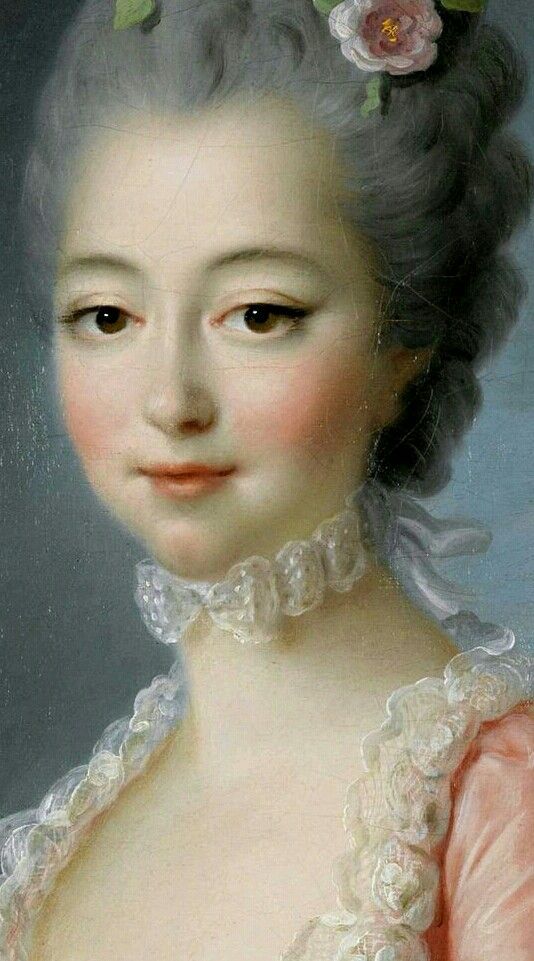
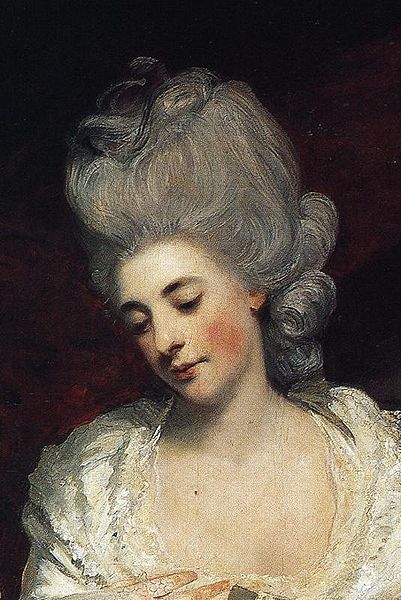
The important thing is to choose hairstyles that work for your decade, always. And for your age and social class. I often see women in their fifty-to-sixties wearing their hair half down as not yet married girls for mid 19th century events. And I see long haired girls just doing the milkmaid braid crown for every century. This doesn’t work. In hairstyles there are shapes, styles, fashions, just like in clothing, and if your hair doesn’t match, it adds to that synthetic lace, it adds to that not perfect colour and makes you look not out of a painting. Keeps you from hearing “you look just…real!”.
Youtube is a world full of tutorials. Amazon is a world full of books on hair and hats. This book is your bible: The Mode in Hats and Headdress: A Historical Survey with 198 Plates, R. Turner Wilcox, Dover Fashion and Costumes. And there’s more, but this gives you plenty of ideas.
I will not cover the techniques of styling and cutting a wig. It’s a very wide subject. If you want a boost to your historical outfit, get a wig or some hairpieces that help you achieve the look, and you’ll get a boost to the final result you can’t even imagine.
Last, but not least: makeup.
I wear modern makeup with my period costumes. Sometimes I do a certain makeup to look good in photographs, which looks weird in person, depends on the occasion. I am not one of those who use historical makeup. I think the important part is to do what they did, achieve the colours they achieved in certain areas with the help of modern technologies in makeup, makeups that last longer and are easier to use beautifully. Always avoid full coverage foundation.
I use invisible primers, green concealer for blemishes and powder makeup. Makeup was avoided in most of the 19th century, but was used before and after. Try to aim for a natural look in this time frame. Avoid blush, lipstick, mascara. When using makeup, compare your face to paintings. Don’t use the eyeshadow like we see in commercial nowadays, don’t do the wing eyebrow, don’t use false lashes and too much mascara. If in doubt, add less.
My last advice is to avoid tan, if possible. I am of the idea that you should do what you like the other days of your life, I have short hair. But this is something that really helps you to get the right look, if you’re caucasian. I fyou’re a waitress under the summer sun all day, ok. But if you’re going to have an event, getting to a tanning salon the day before to get pretty as you’d do for an evening out, might not be the smartest idea. I see many fifty-to-sixty ladies that look like they just came out fo the salon, with mid-victorian ballgowns. If you’re from India, you’d look amazing. But if you’re caucasian…it doesn’t help you much.
You can’t just cover yourself with lighter makeup to look pale, after two weeks at the Bahamas, it looks weird. And if you are not born with a darker complexion, you can really see it. If you have a beautiful caramel or chocolate skin, you’re lucky in this case, tanned or not, you will look right.
Luckly it’s no longer believed that tan is mandatory for the modern person. We start having conscience of the dangers of excessive sunbathing and a poor use of sunscreen. And most of all we know that protecting the skin from the damages of the sun is the most effective way to avoid ageing.
I am often complimented for my complexion at historical events. I have simply found a hobby where what I’ve been taught to consider a disadvantage is something good. I’ve been mocked for a long time for it, as I live in a land where everyone should get his tan by the end of the summer, and if you don’t they laugh at you because “Oh, one can’t even seen you’ve been on holiday, poor girl”. “You’re so pale you look like a ghost”. “I won’t dye your hair dark brown or black, you’d look like Morticia”. I get sunburned with sunscreen, I’ve spent excruciting nights of pain after trying to get my skin to the golden colour my sister achieved easily. So my advice is to embrace what nature has given you, dark or light that it might be. Don’t use a lighter foundation. Powder, if you wish, but try to keep it natural, and it will pay off.

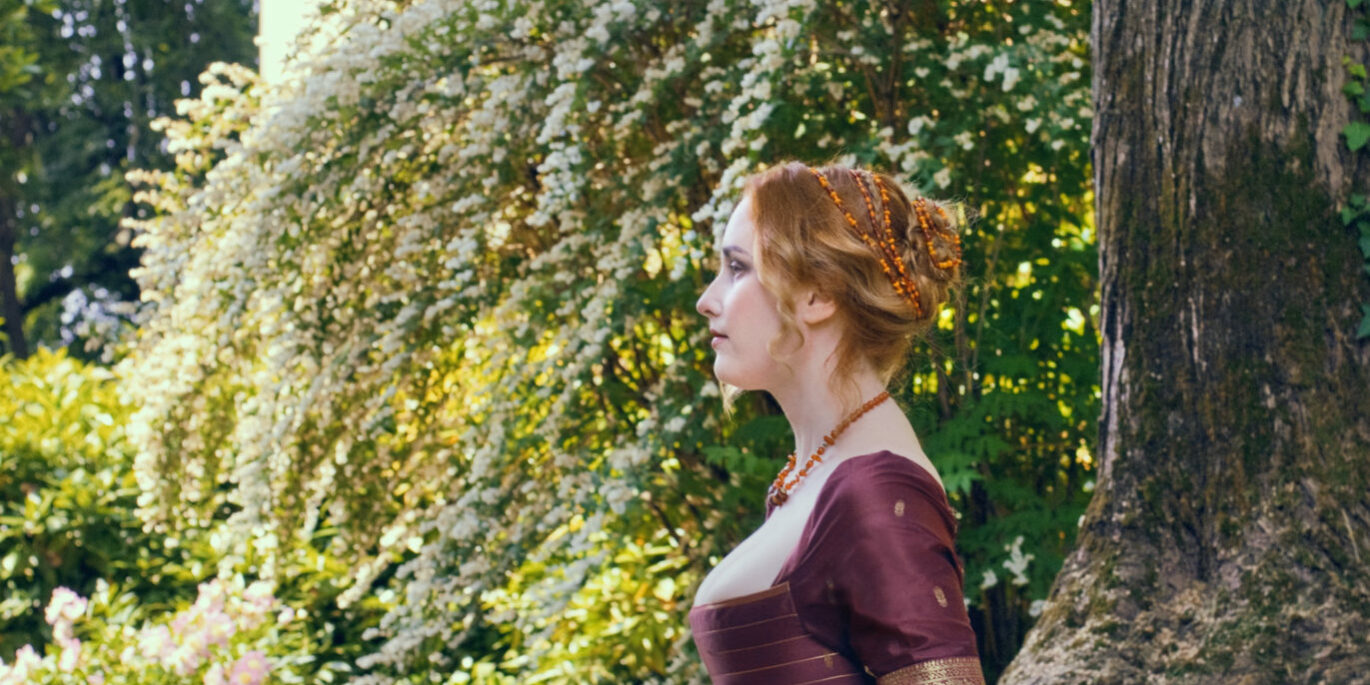



Thank you so much! This was fascinating to read. I do steampunk rather than historical reenactment so I can get away with some things, but I’m definitely going to have to re-think my petticoat game after reading this!